
SAP Document Information Extraction: How AI Extracts Data in Minutes
The SAP Document Information Extraction Service is a solution designed to automate the extraction of data from various document types, such as invoices, purchase orders, and contracts.
It leverages machine learning and artificial intelligence to analyze and interpret document content, transforming unstructured data into structured formats that can be easily integrated into business processes.
In this detailed tutorial, we walk you through the fundamentals of SAP Document Information Extraction Service. We will show you how to configure schema, upload custom documents like invoice and resume to extract information from it.
Let’s dive in,
You can use SAP BTP Trial Account to complete this guide. If you don’t have an SAP BTP account follow this tutorial.
Step 1: Logon to SAP BTP Trial.

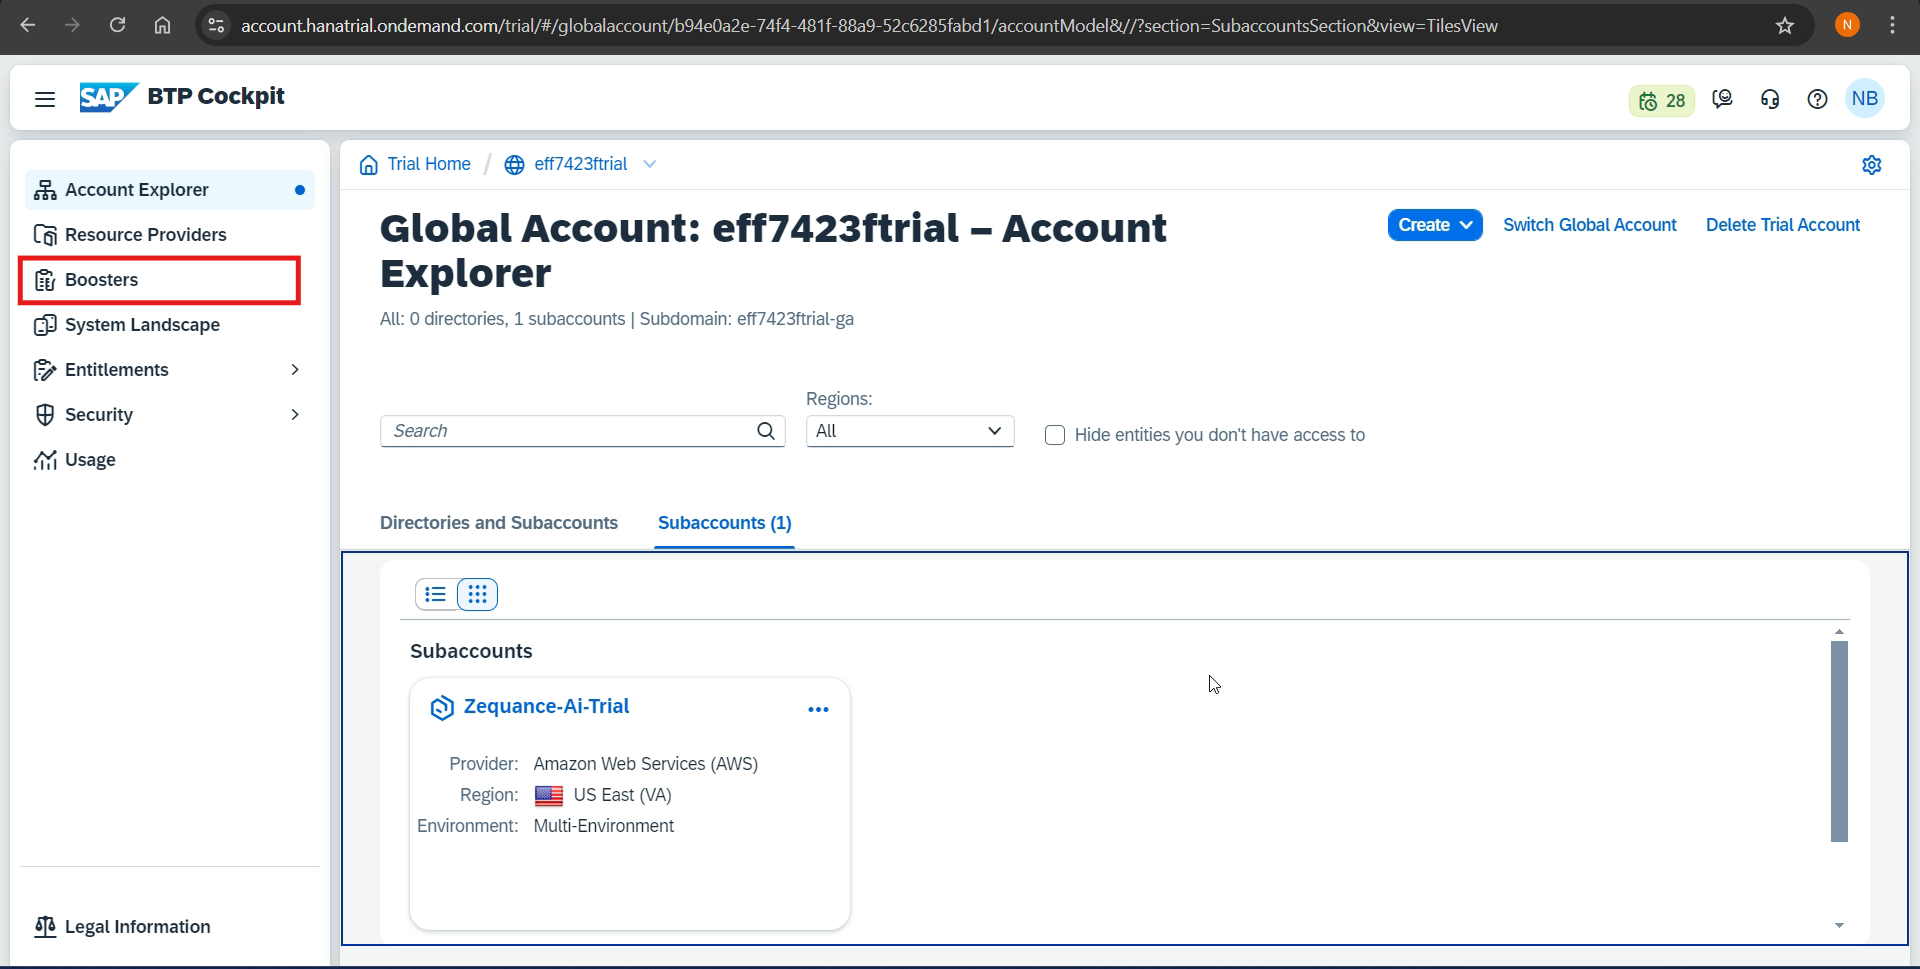
Step 2: From global account click on Boosters in left pane.
Step 3: Search for “Document” and choose “Set up account for Document Information Extraction“.

Step 4: Click on Start, and choose a subaccount and click on Finish.

Step 5: On the new screen click on Go to Application. It will take you to the Document Information Service window.

Step 6: From the new screen click on highlighted icon on the left to create a schema.
Note: A schema defines how data will be extracted from documents, specifying which fields are relevant and how they should be structured. This helps ensure that the information is organized and easily accessible.

Step 7: Click on Create.
And provide a name for schema. Choose “custom” as the Document Type. And press Create.
Note: We’re going to upload a sample invoice and do extract the content in it. In order to extract information from the invoice document we’ve to define each field in the below screens.


Step 8: Click on the schema that we have just created.

Step 9: Click on ADD to add Header fields.

Step 10: Enter the fields with their respective data type that you want to extract from the document as given below.
For example: in order to extract date from the invoice provide Name as DATE, and define data type as “date”. Then, click on Save.

Step 11: After entering all the relevant header and item details click on Activate.

Step 12: Click on Document icon on the left.

Step 13: Add the sample invoice by clicking on the plus icon “+“. You can choose any invoice document for testing.

Step 14: Choose Document Type as “Custom”. Then, choose the schema that was created previously.
Click on plus icon “+” .

Step 15: Choose your file to test. And click on Open.

Step 16: Click on Confirm.

Step 17: Once you find document status as READY . Click on it.

Step 18: Click on Extraction Results.

Congratulations! You’ve successfully set up the SAP Document Extraction Service and extracted information from the document using advanced AI language models.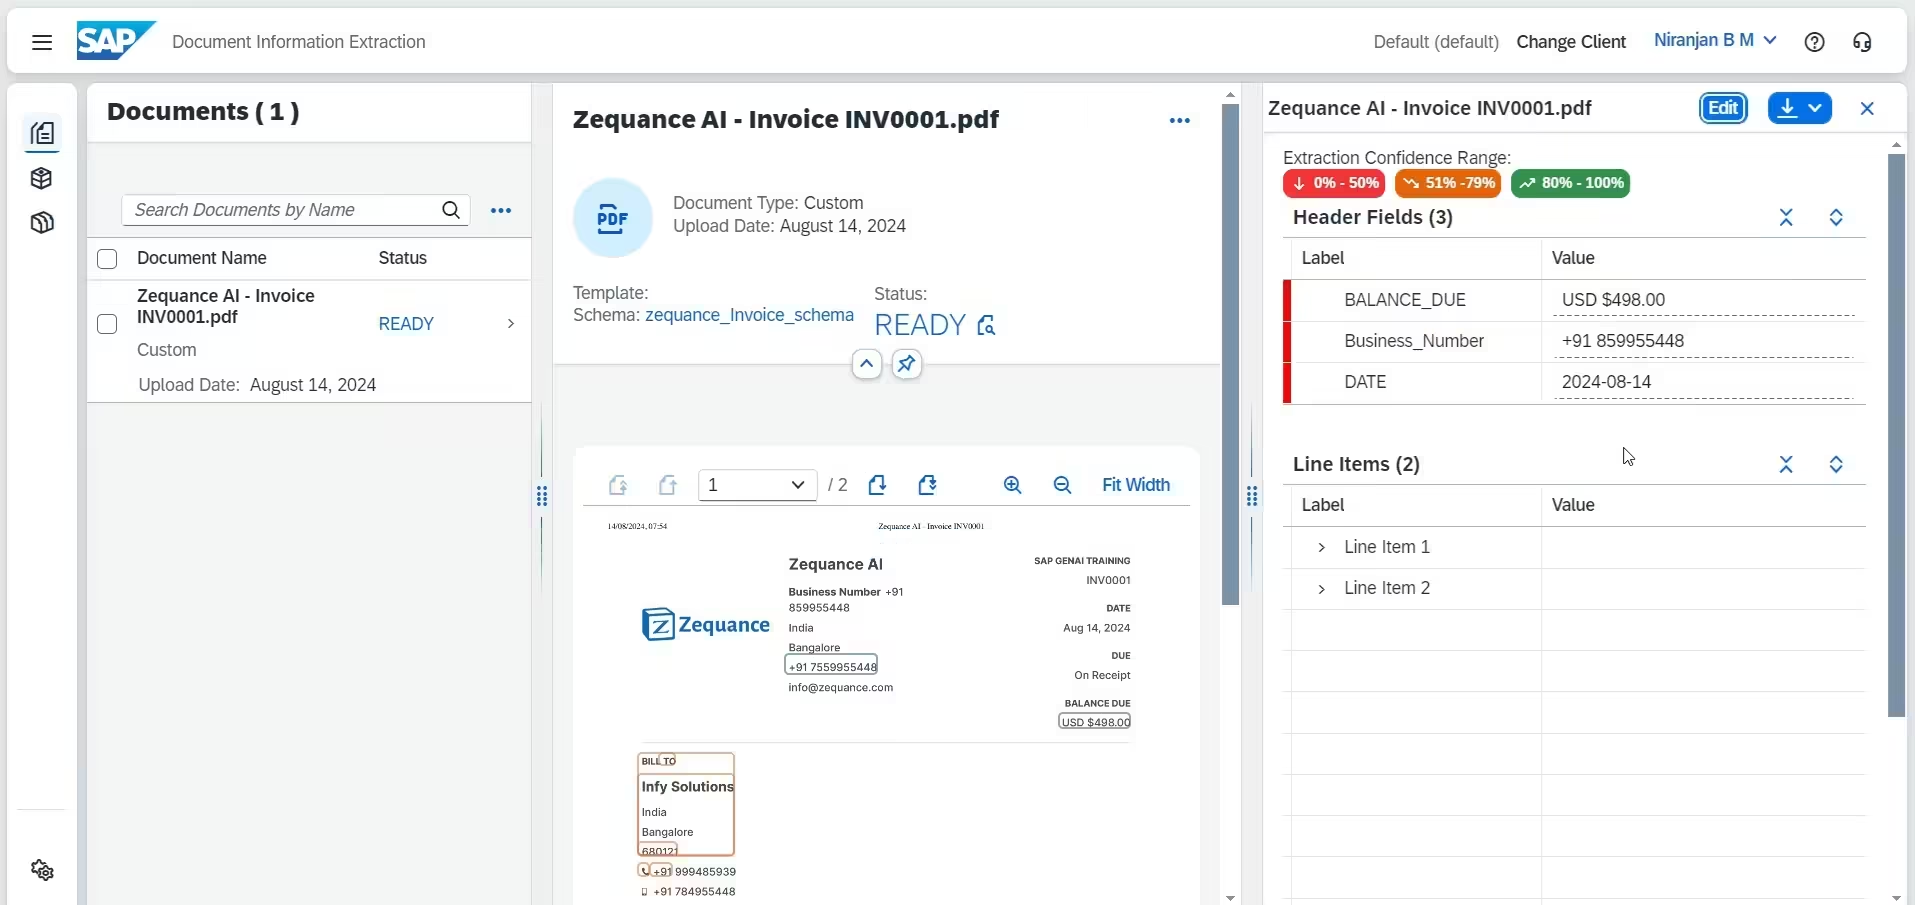
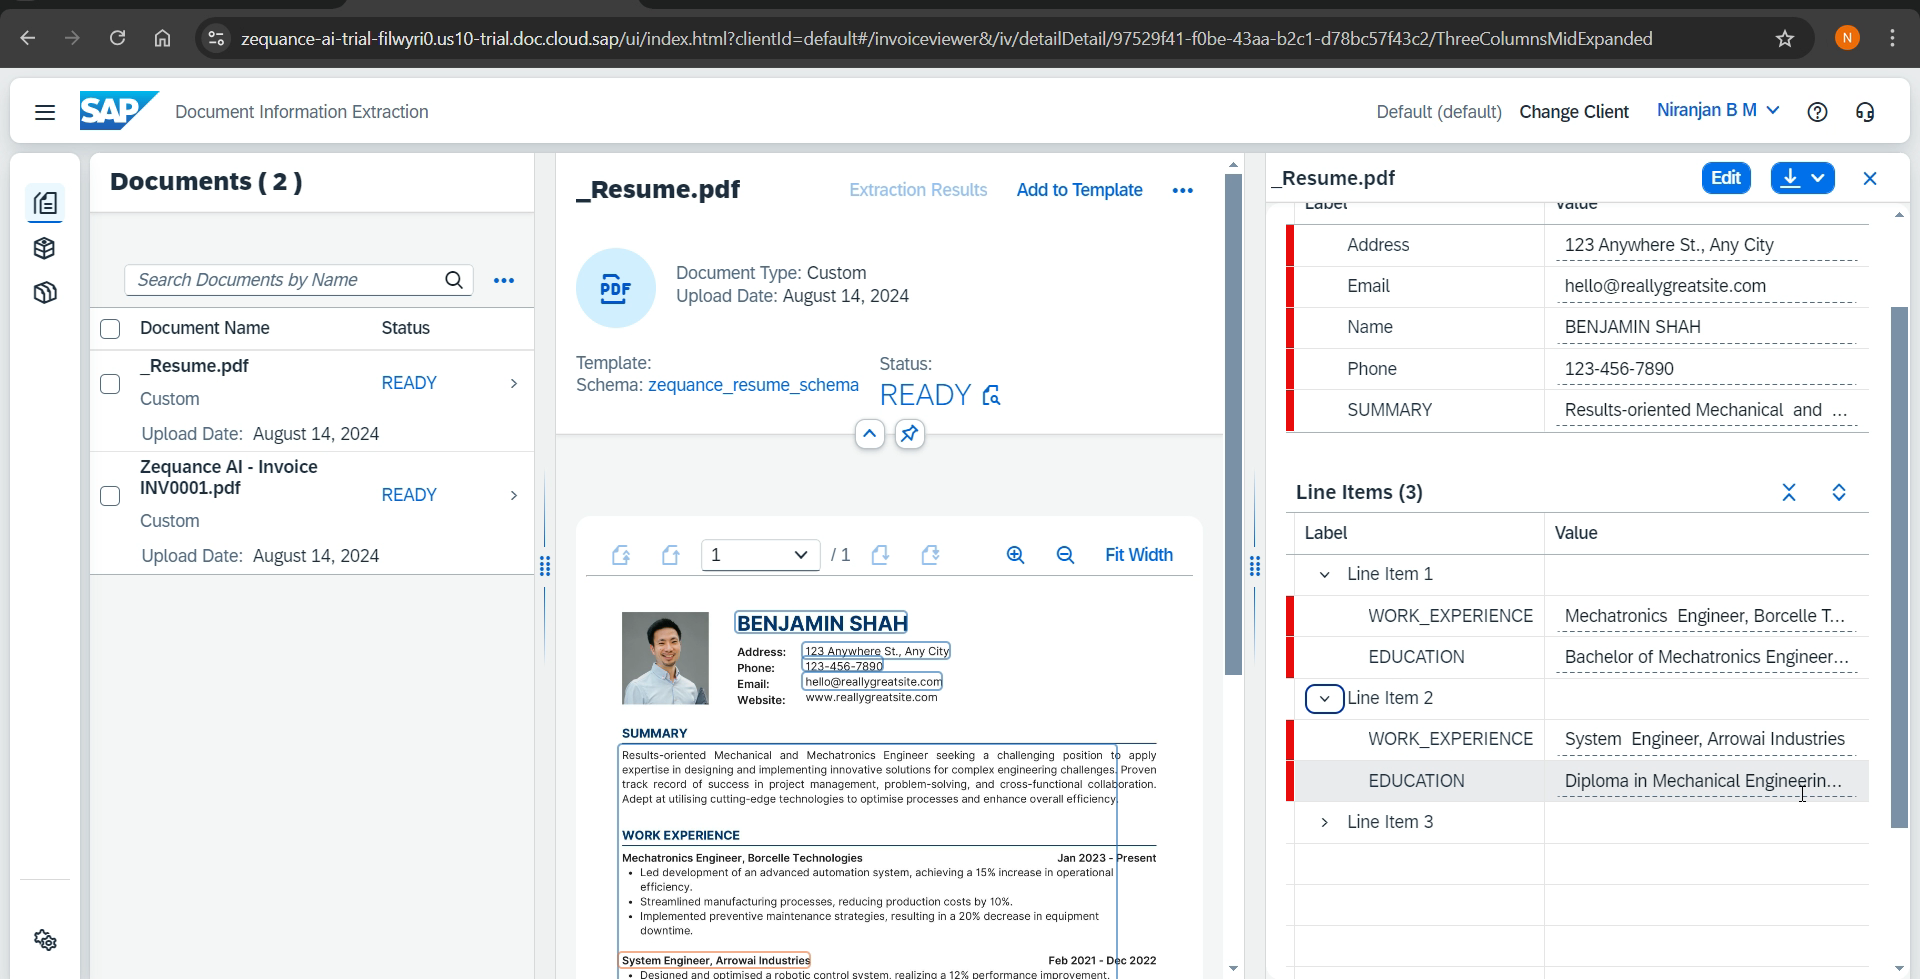
Let’s take a look at another example of document analysis.
You can create custom schemas for different types of documents. Don’t forget to select the appropriate schema when adding custom documents. Below is a snapshot of how the schema appears for a resume.
In this tutorial, we’ve examined how the SAP Document Extraction Service, combined with Generative AI and advanced extraction techniques, can revolutionize the management of custom documents. By following the steps provided, you’ve learned to streamline a previously tedious and error-prone process, allowing for quick and accurate insights from large volumes of data and complex documents.
Here is a detailed demo to help you learn further!
Alma TA is the SAP AI Solutions Director at Zequance.AI, specializing in SAP Business AI, SAP Joule, SAP AI Core, and Generative AI on SAP BTP. With a background in data science and enterprise analytics, she helps SAP professionals and organizations understand how SAP’s AI architecture works in real-world implementations.
Her work focuses on breaking down complex topics such as SAP RPT-1, Retrieval-Augmented Generation (RAG), SAP AI agents, and enterprise AI governance into practical, implementation-ready insights.
Alma regularly publishes in-depth technical breakdowns of SAP’s AI strategy and architecture, helping consultants, architects, and decision-makers design smarter SAP AI solutions.
")

