
Build Full-Stack Apps with SAP Joule: Step-by-Step Guide for Developers
In this blog, we’ll guide you through the process of building a full-stack application from scratch using SAP Build Code and SAP Joule’s Generative AI features.
We’ll leverage SAP Joule’s Generative AI to streamline the development of data models and application logic for essential functionalities like customers, purchases, and redemptions.
Whether you’re a seasoned developer or just starting out, this walkthrough will show you how these powerful tools can accelerate your development process and enhance your projects.
Before diving in, here’s what we’ll cover in this guide:
1️⃣ Start with a Full-Stack Template
Kick off your project using a prebuilt template in SAP Build Code for a faster setup.
2️⃣ Define Data Entities & Services
Leverage Joule’s Generative AI to model your data and auto-generate backend services.
3️⃣ Generate Business Logic with AI
Use Joule to create application logic and automate repetitive coding tasks.
4️⃣ Design the User Interface
Add a custom UI using SAP Build Code’s visual tools and low-code components.
5️⃣ Test & Refine the Application
Run end-to-end tests, and enhance your app to ensure smooth functionality.
Let’s dive in.
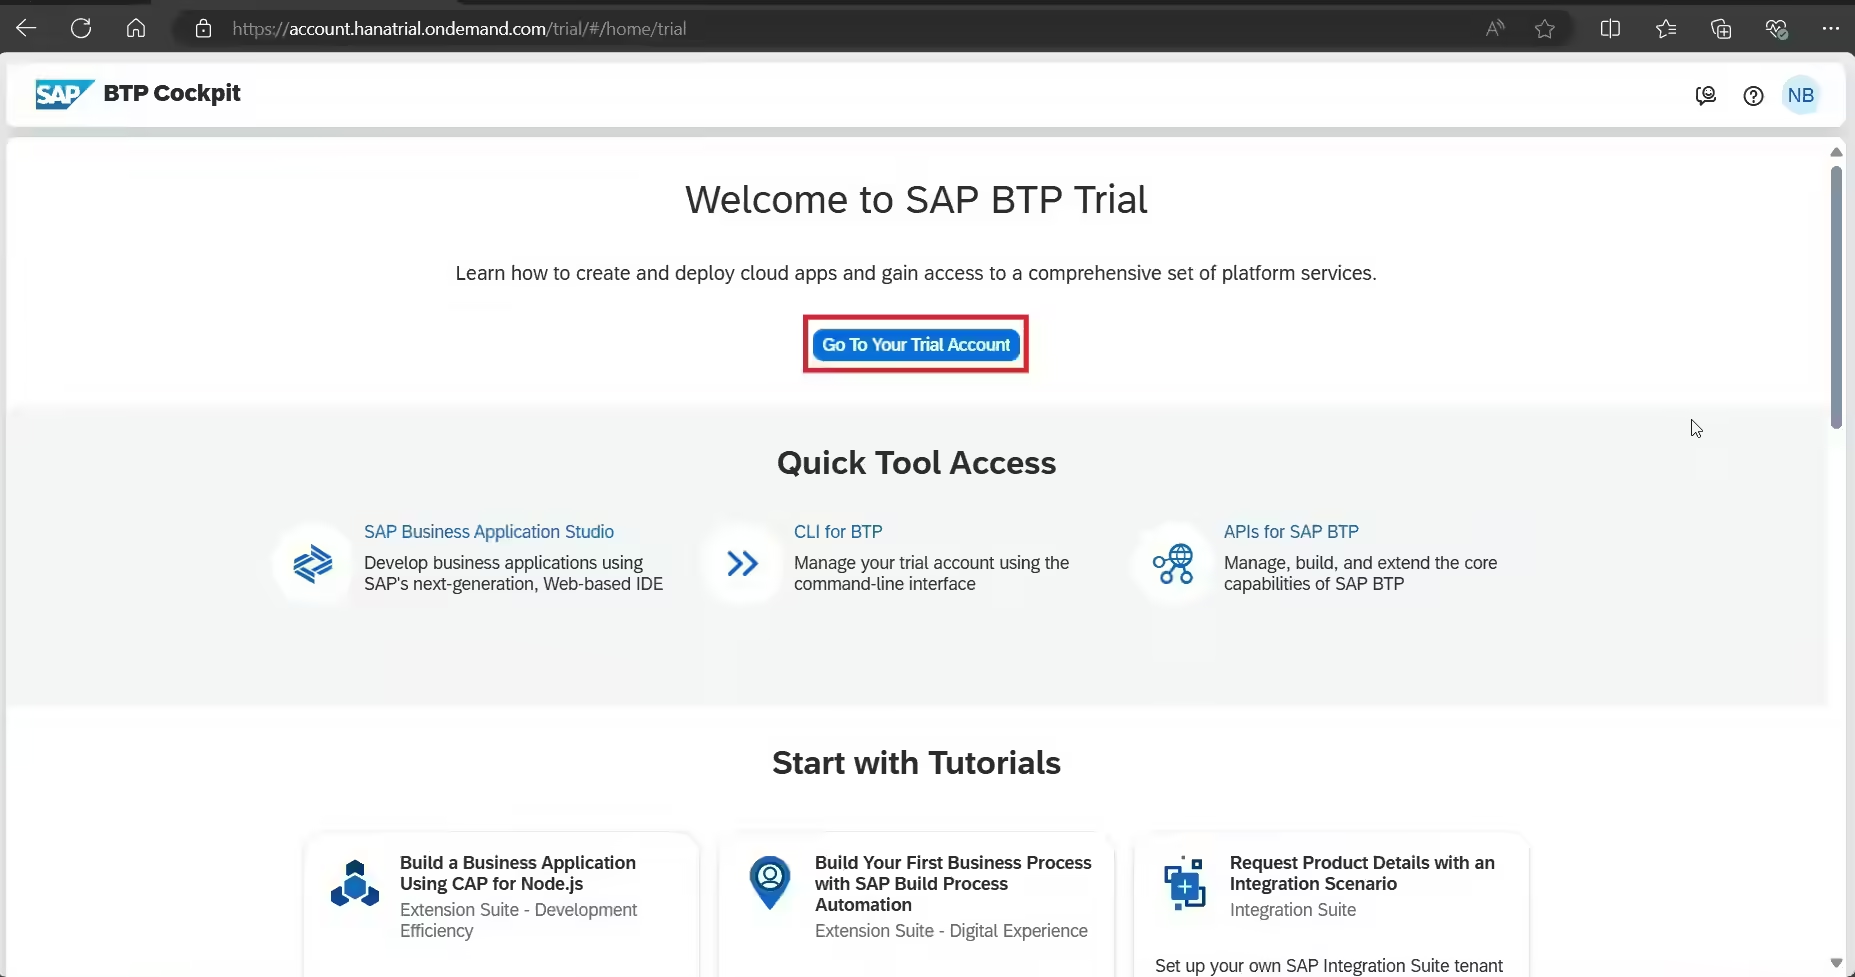
Step 1: Logon to SAP BTP Trial. If you don’t an account and want to setup one this blog will help.
Once your trial account is ready follow these steps: Click on “Go To Your Trial Account”.
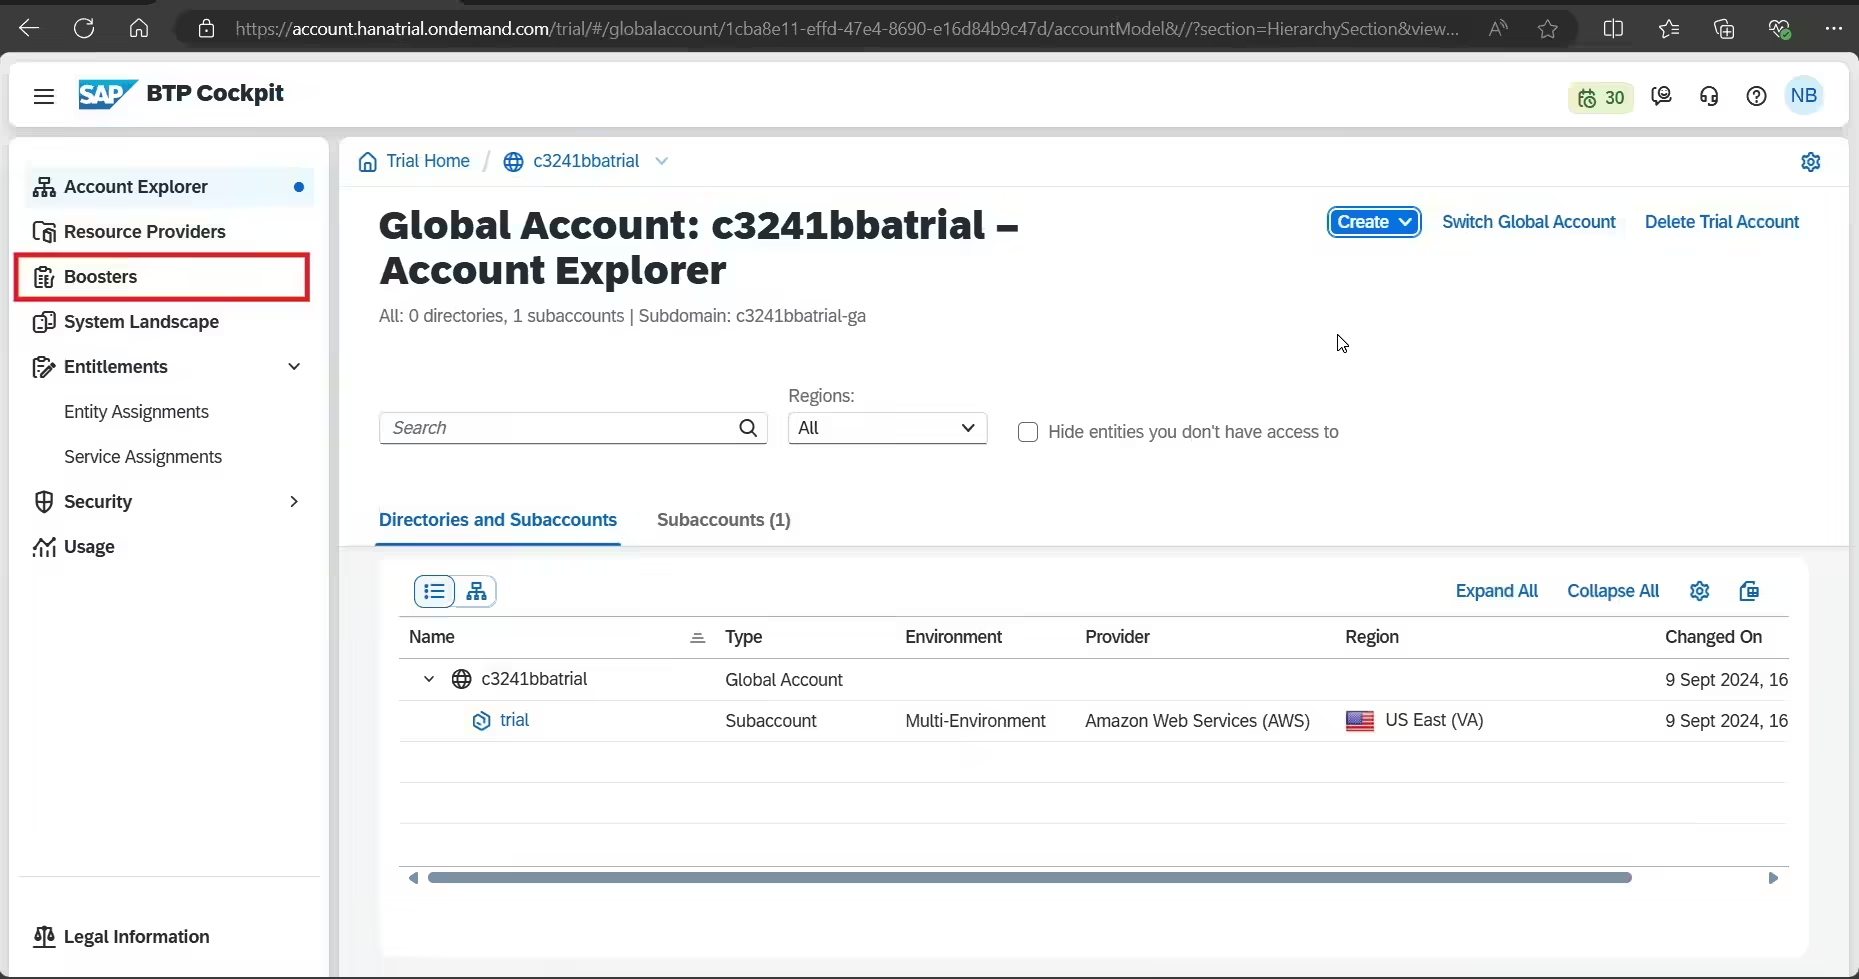
Step 2: Click on Boosters.
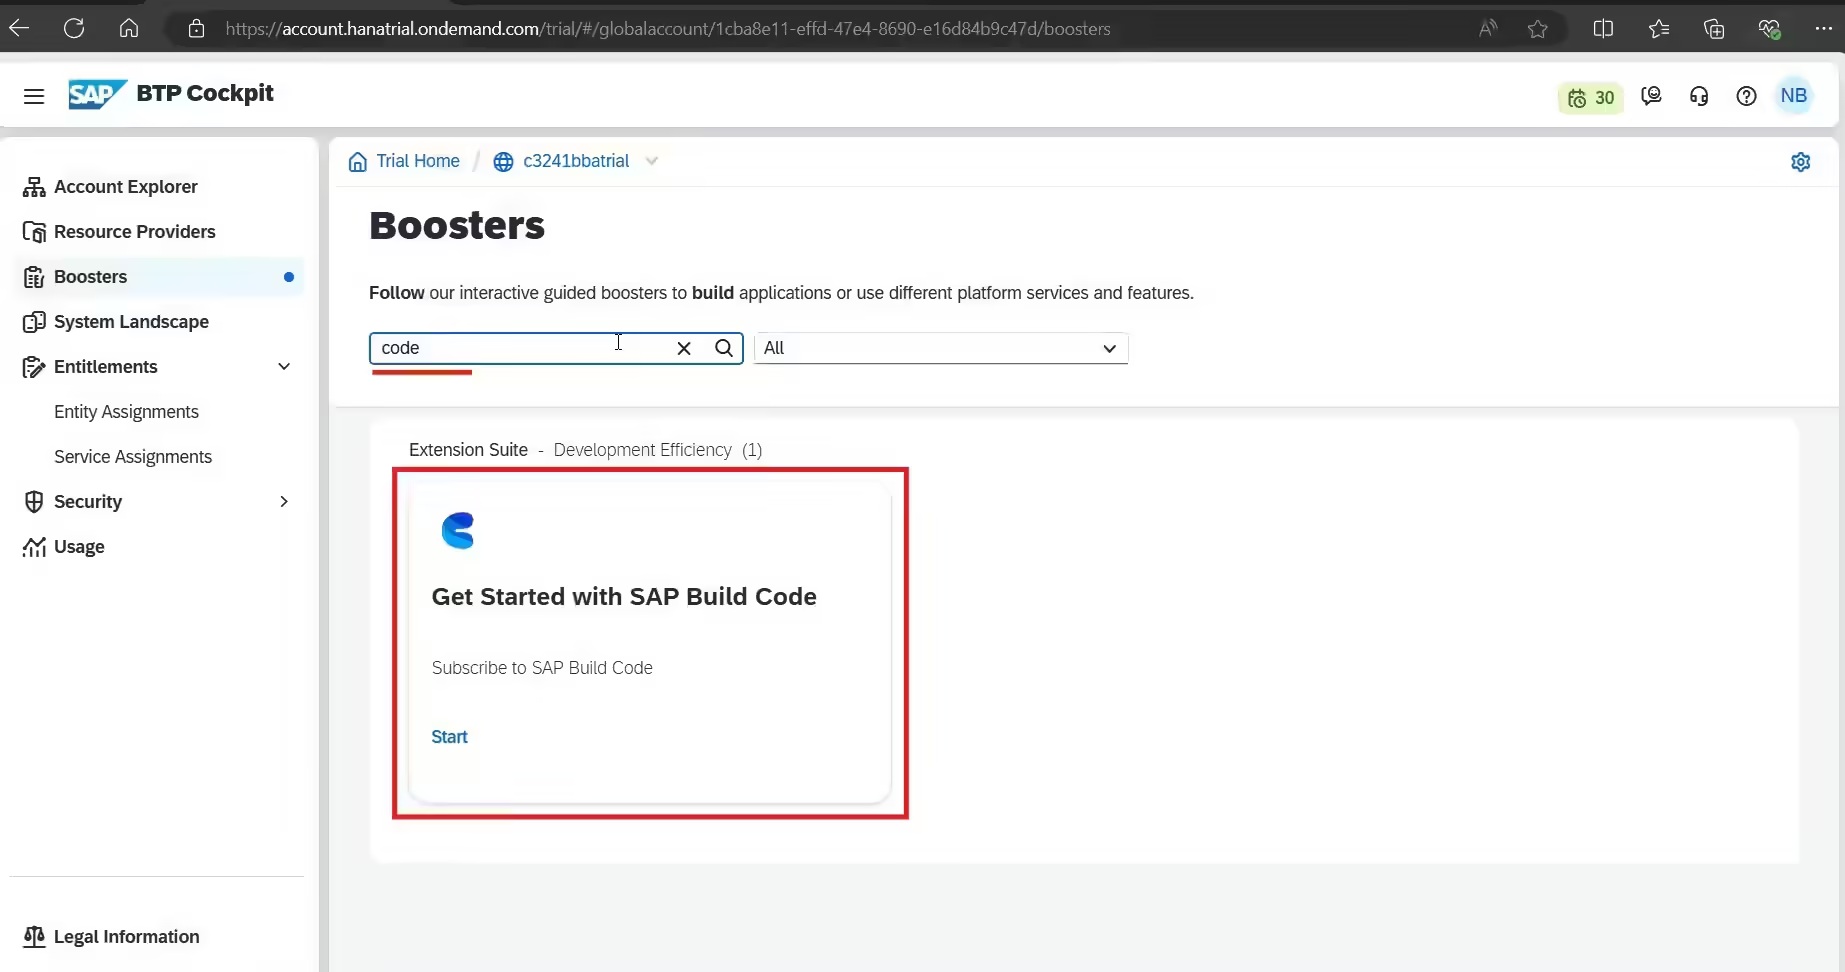
Step 3: Search for “Get started with SAP Build Code ” and Click on it.
Step 4: Click on Start.
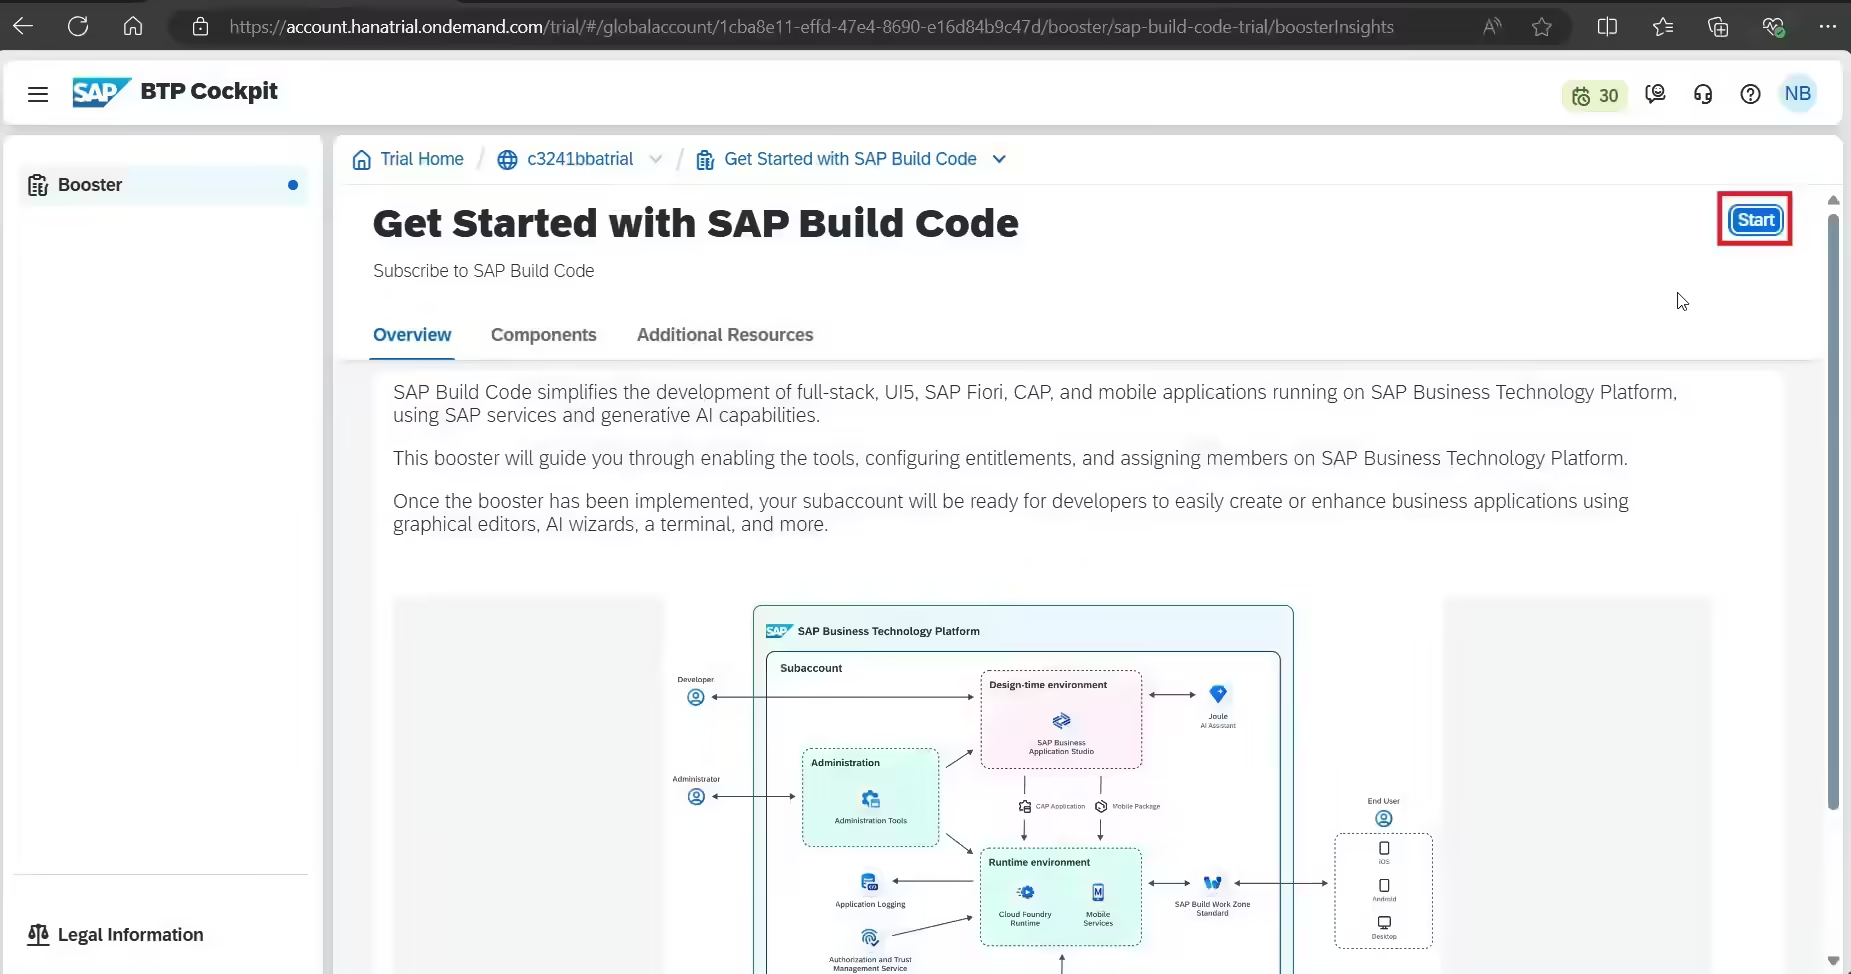
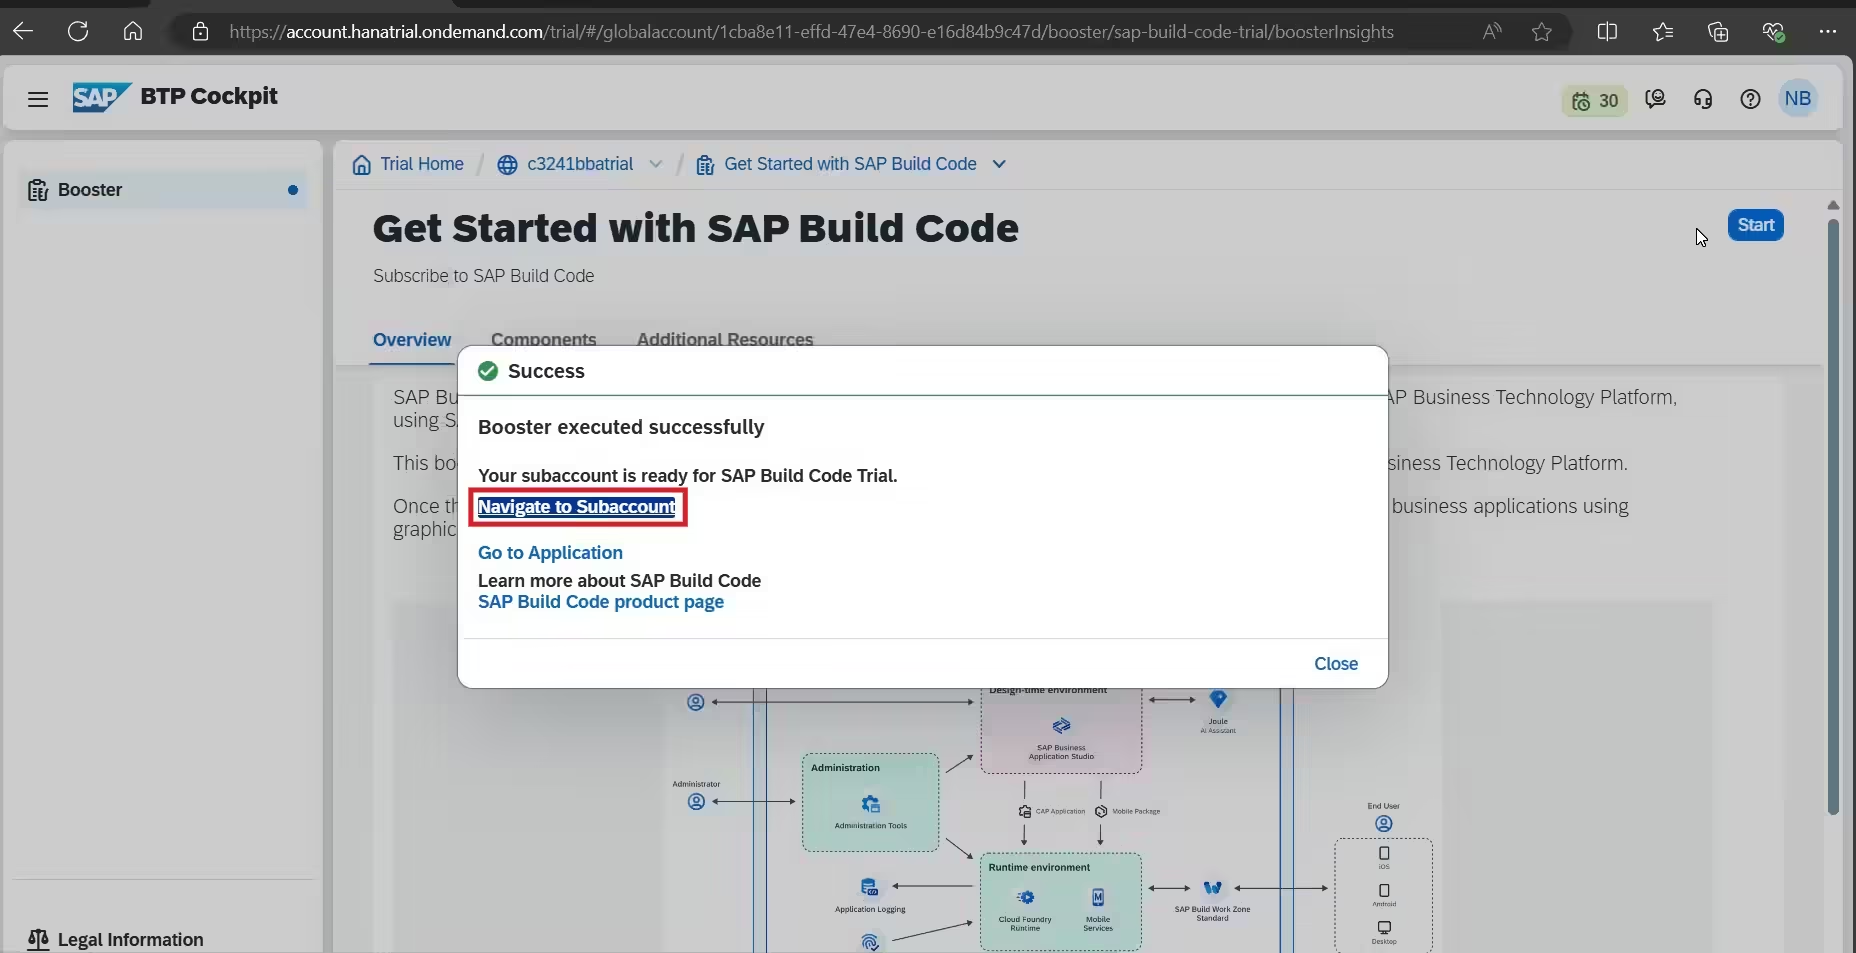
And, wait for few minutes to setup the SAP Build automatically for you.

Step 5: Then, click on Navigate to Subaccount.
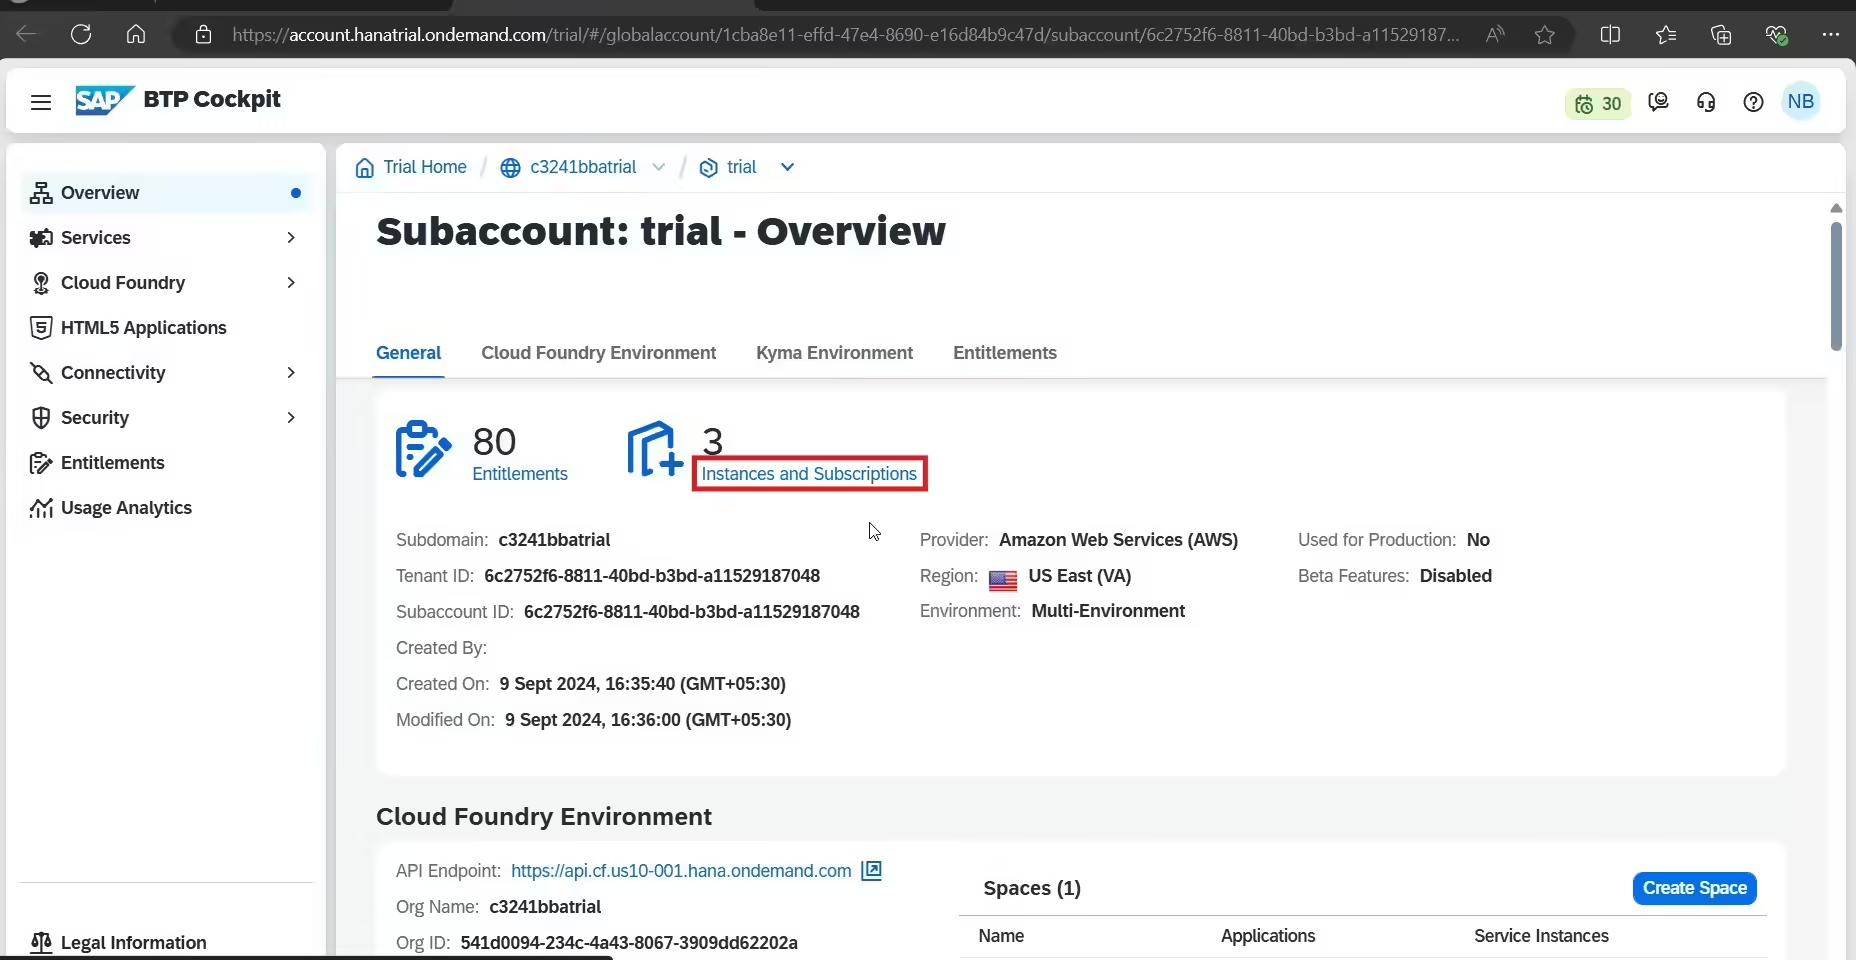
Step 6: Once you’re inside the subaccount click on Instances and Subscriptions.
Step 7: Click on SAP Build code.

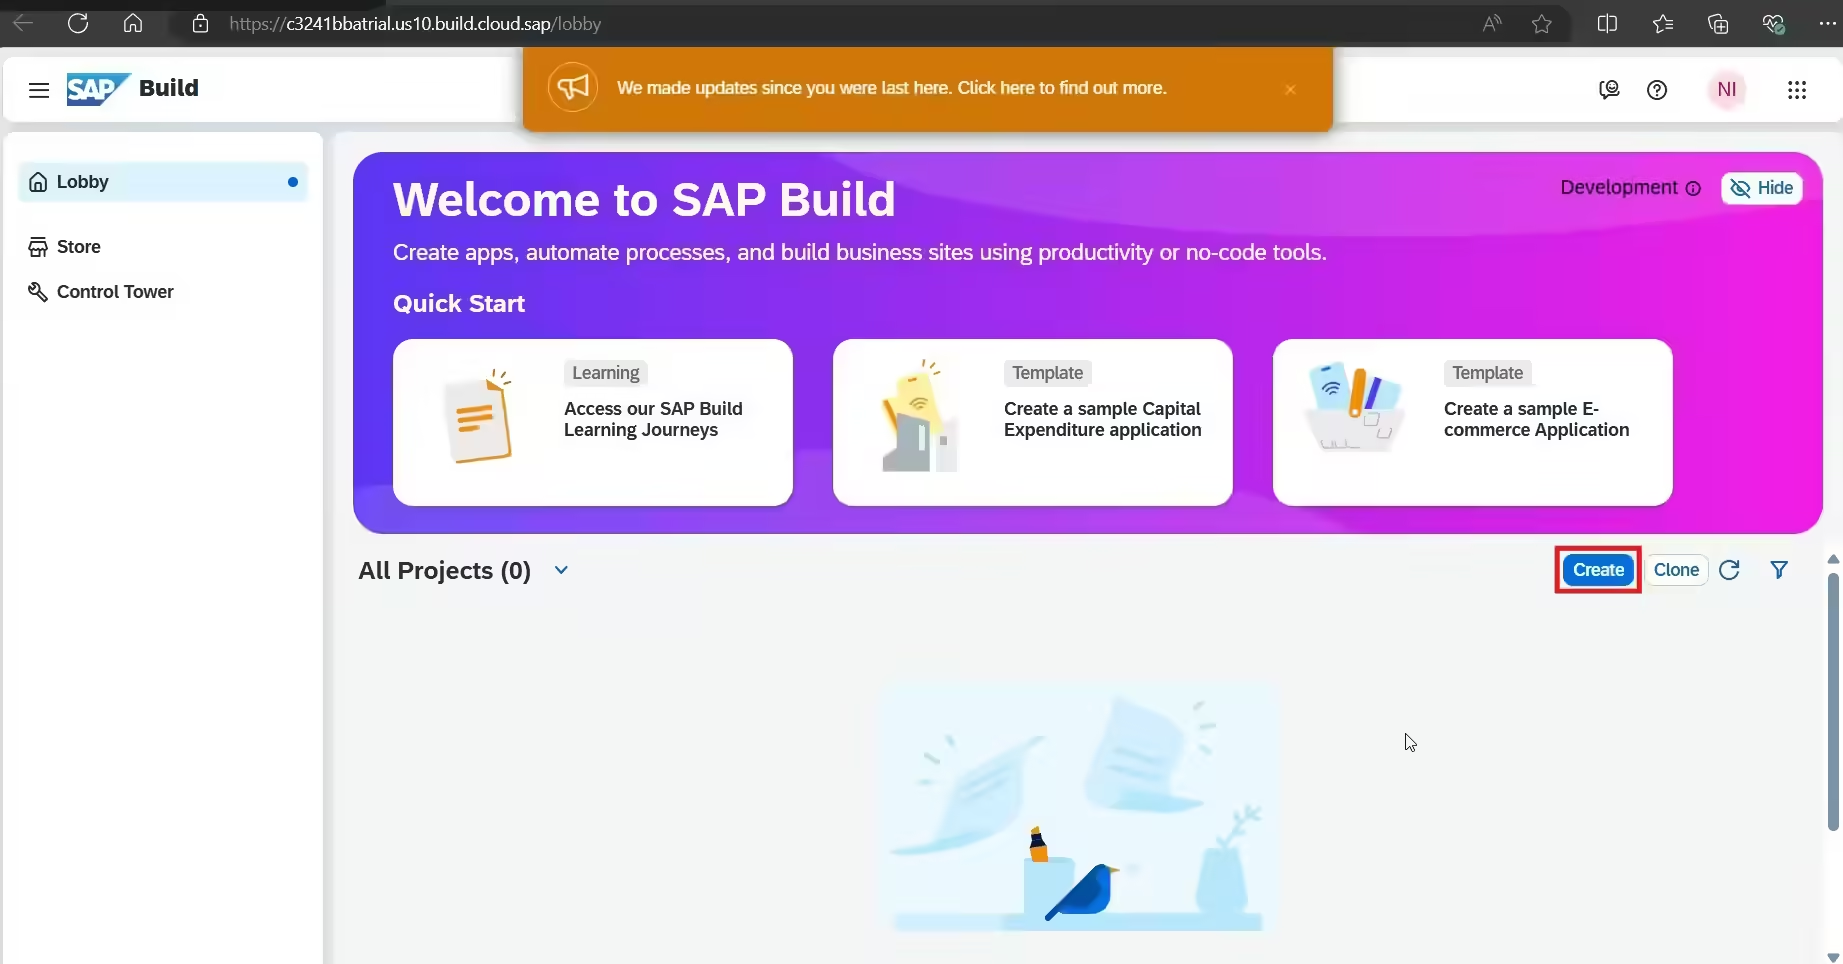
Step 8: Then, Click on Create.
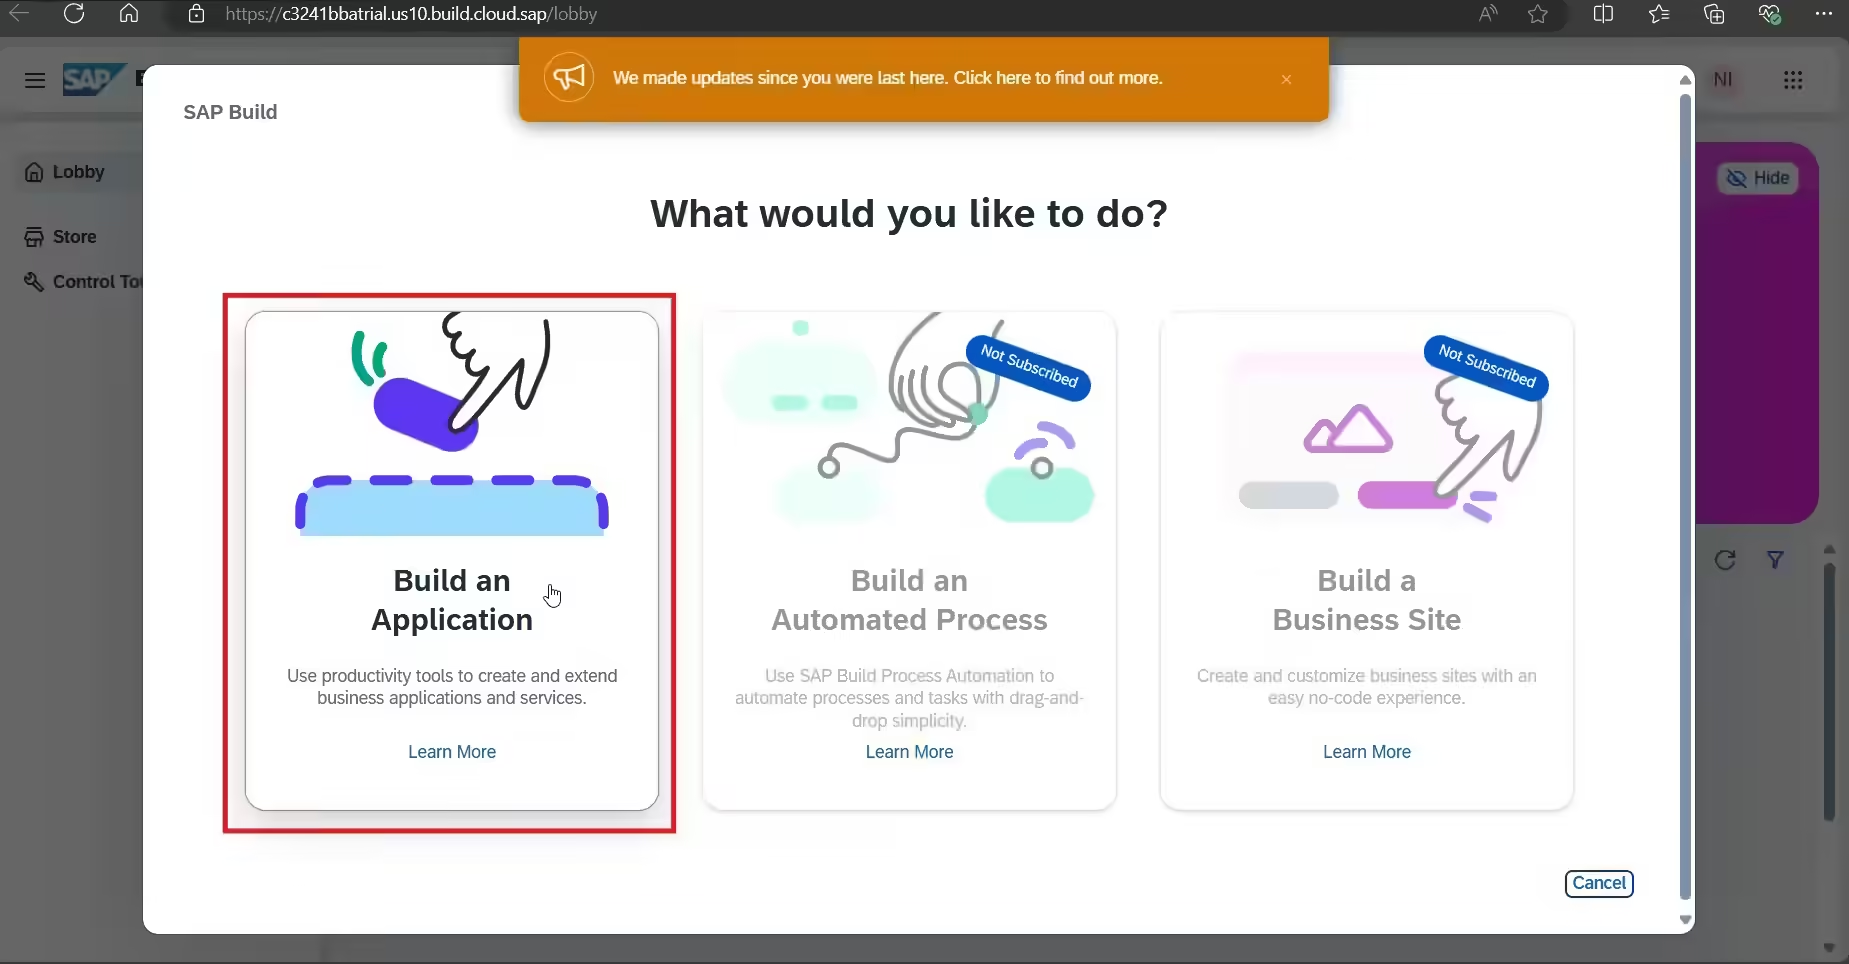
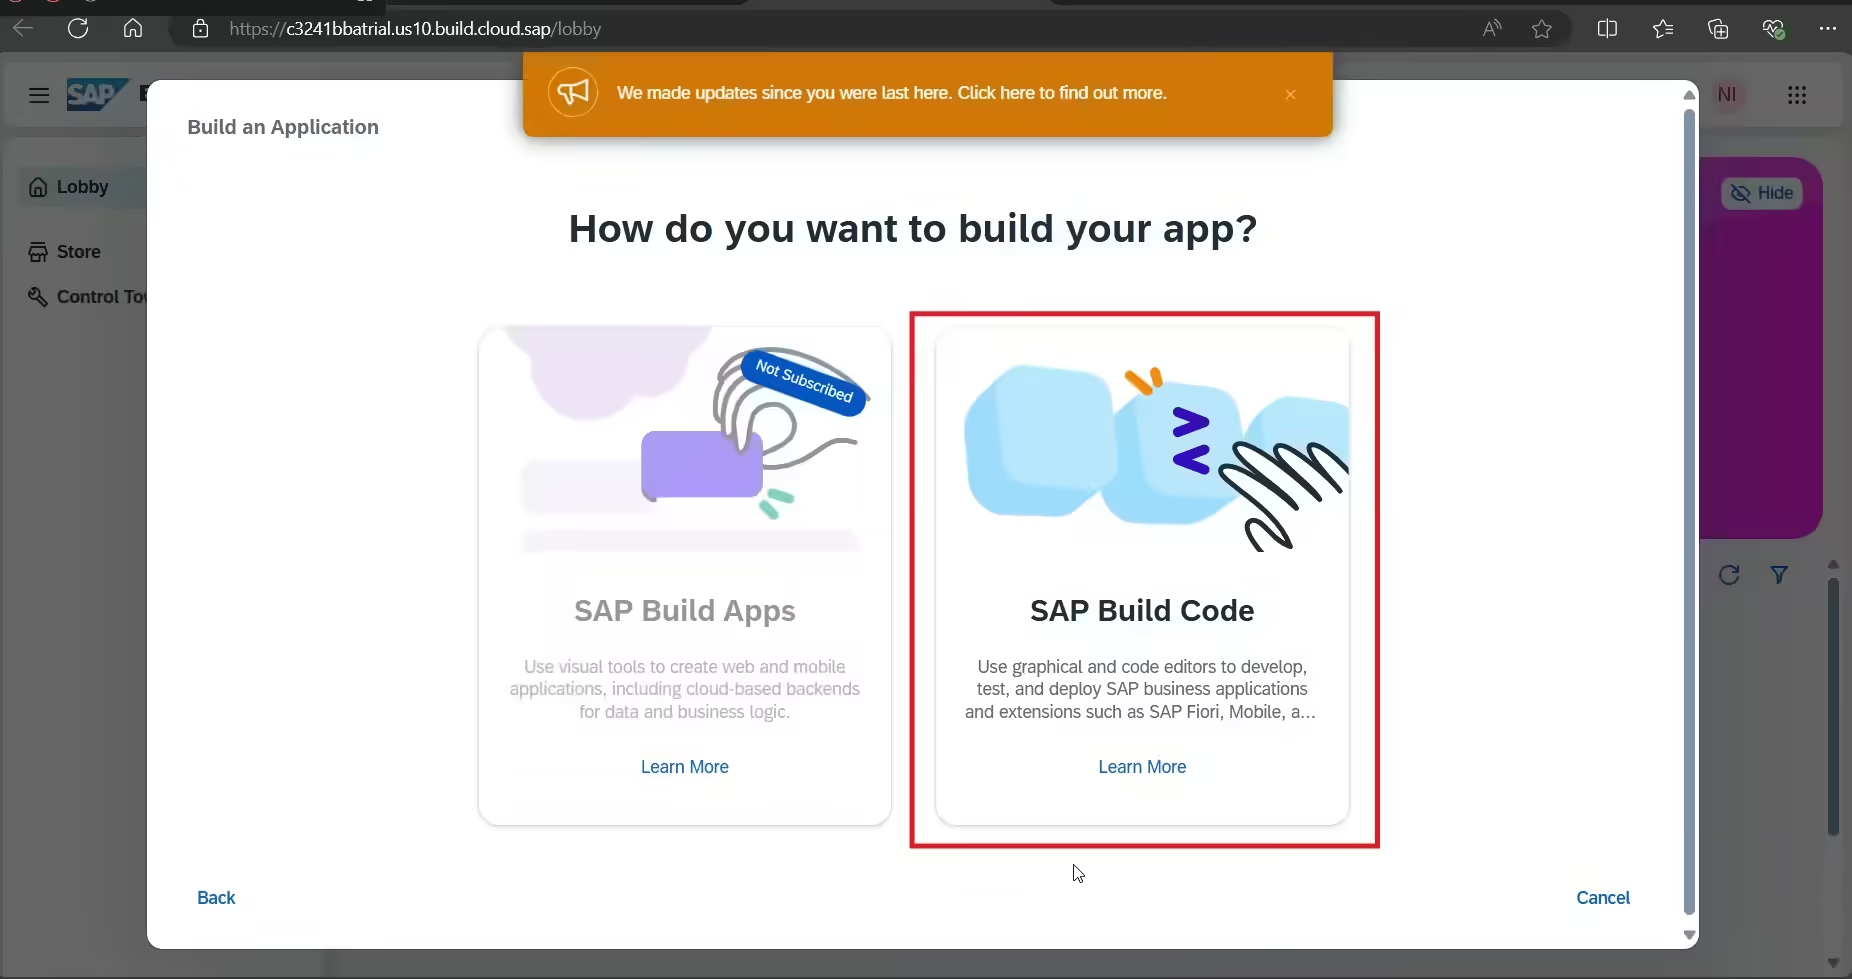
Step 9 :Choose Build an Application. Then, choose SAP Build Code.
Step 10 :Choose SAP Build Code.
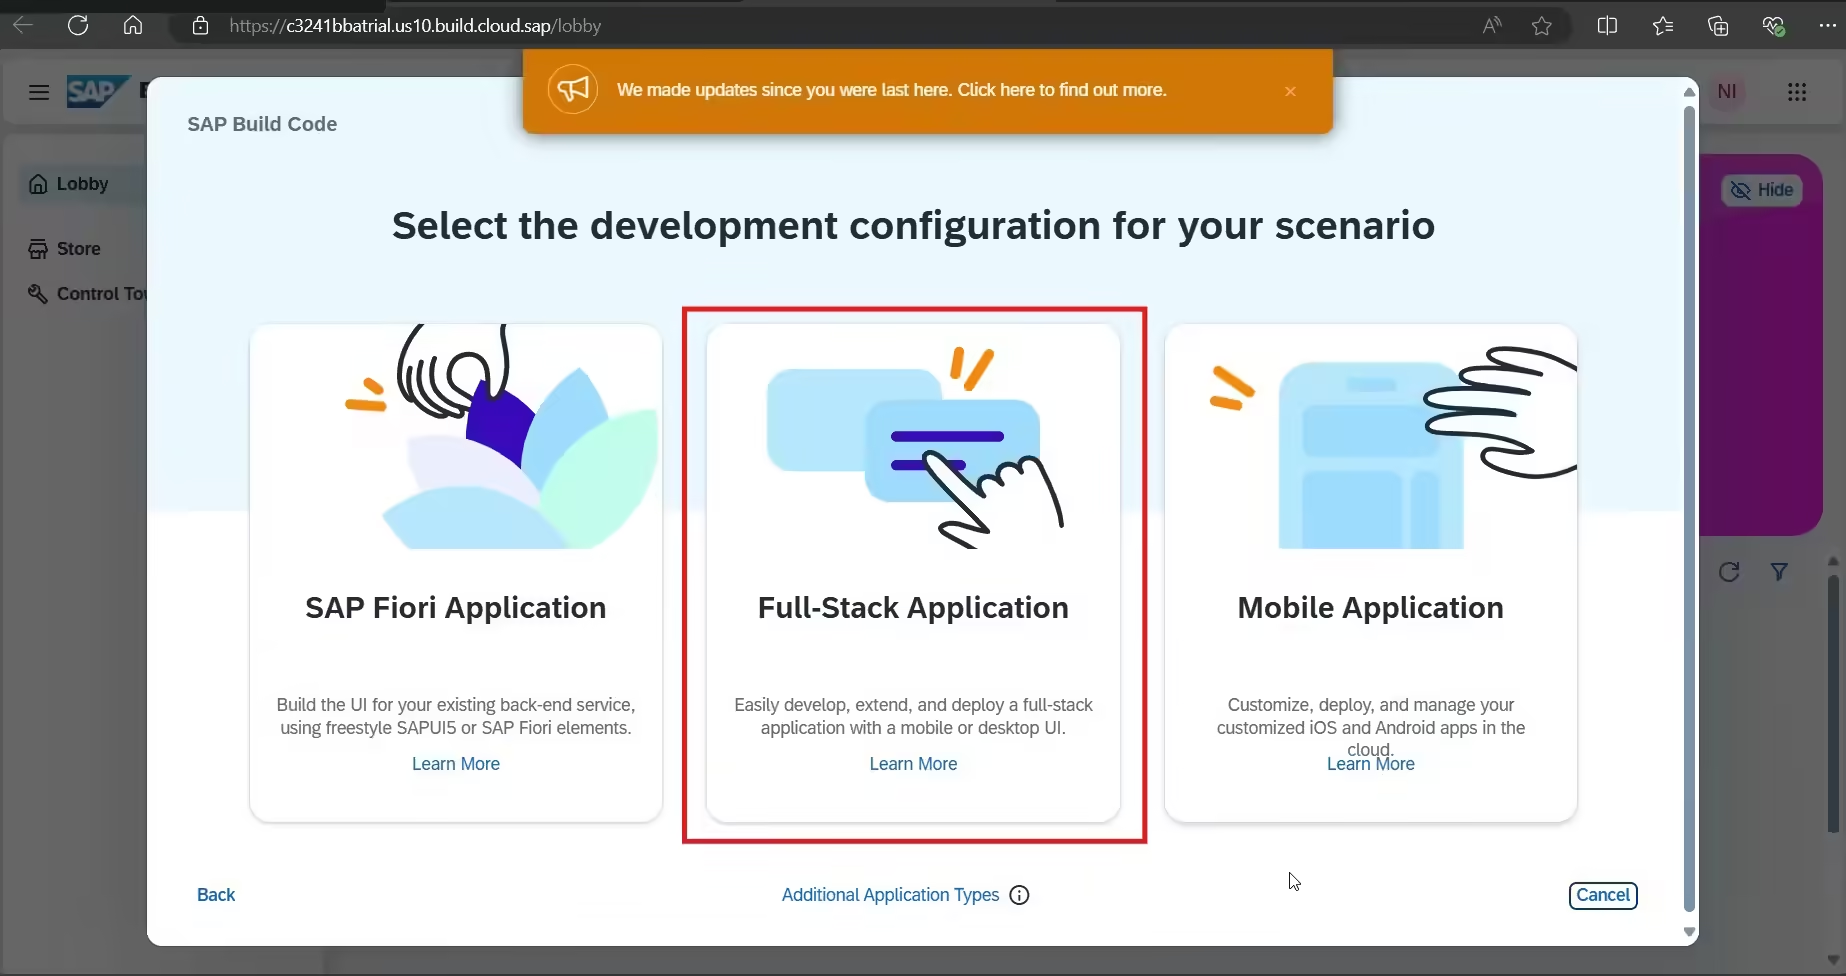
Step 11: Next, choose Full Stack Application.
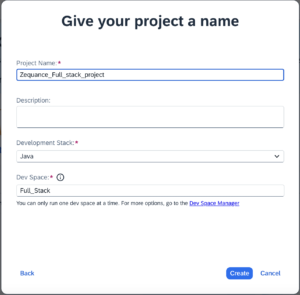
Step 12: Provide a name for the project of your choice and click Create. And select Node or Java as your development stack.
Step 13: It will create a project. Choose the project that you’ve created.

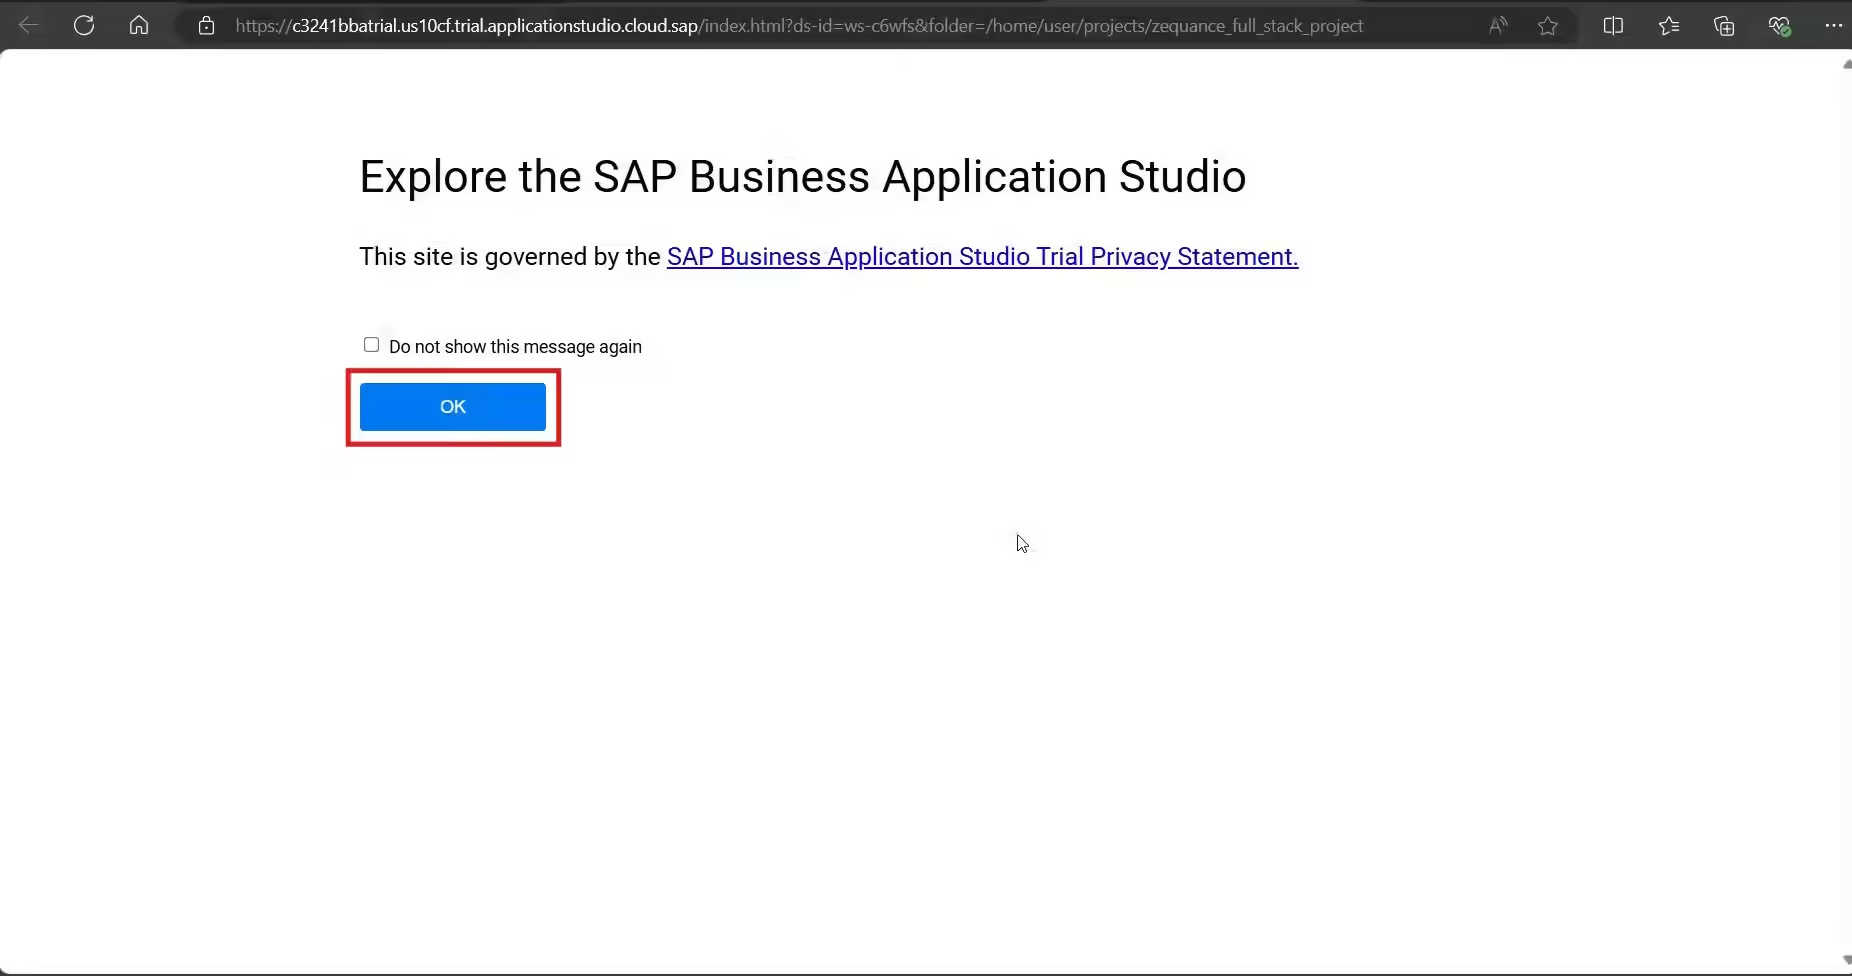
Step 14 :Click on Ok. It will navigate you to SAP Business Application Studio.
Step 15: Click on Joule Icon.
![]()
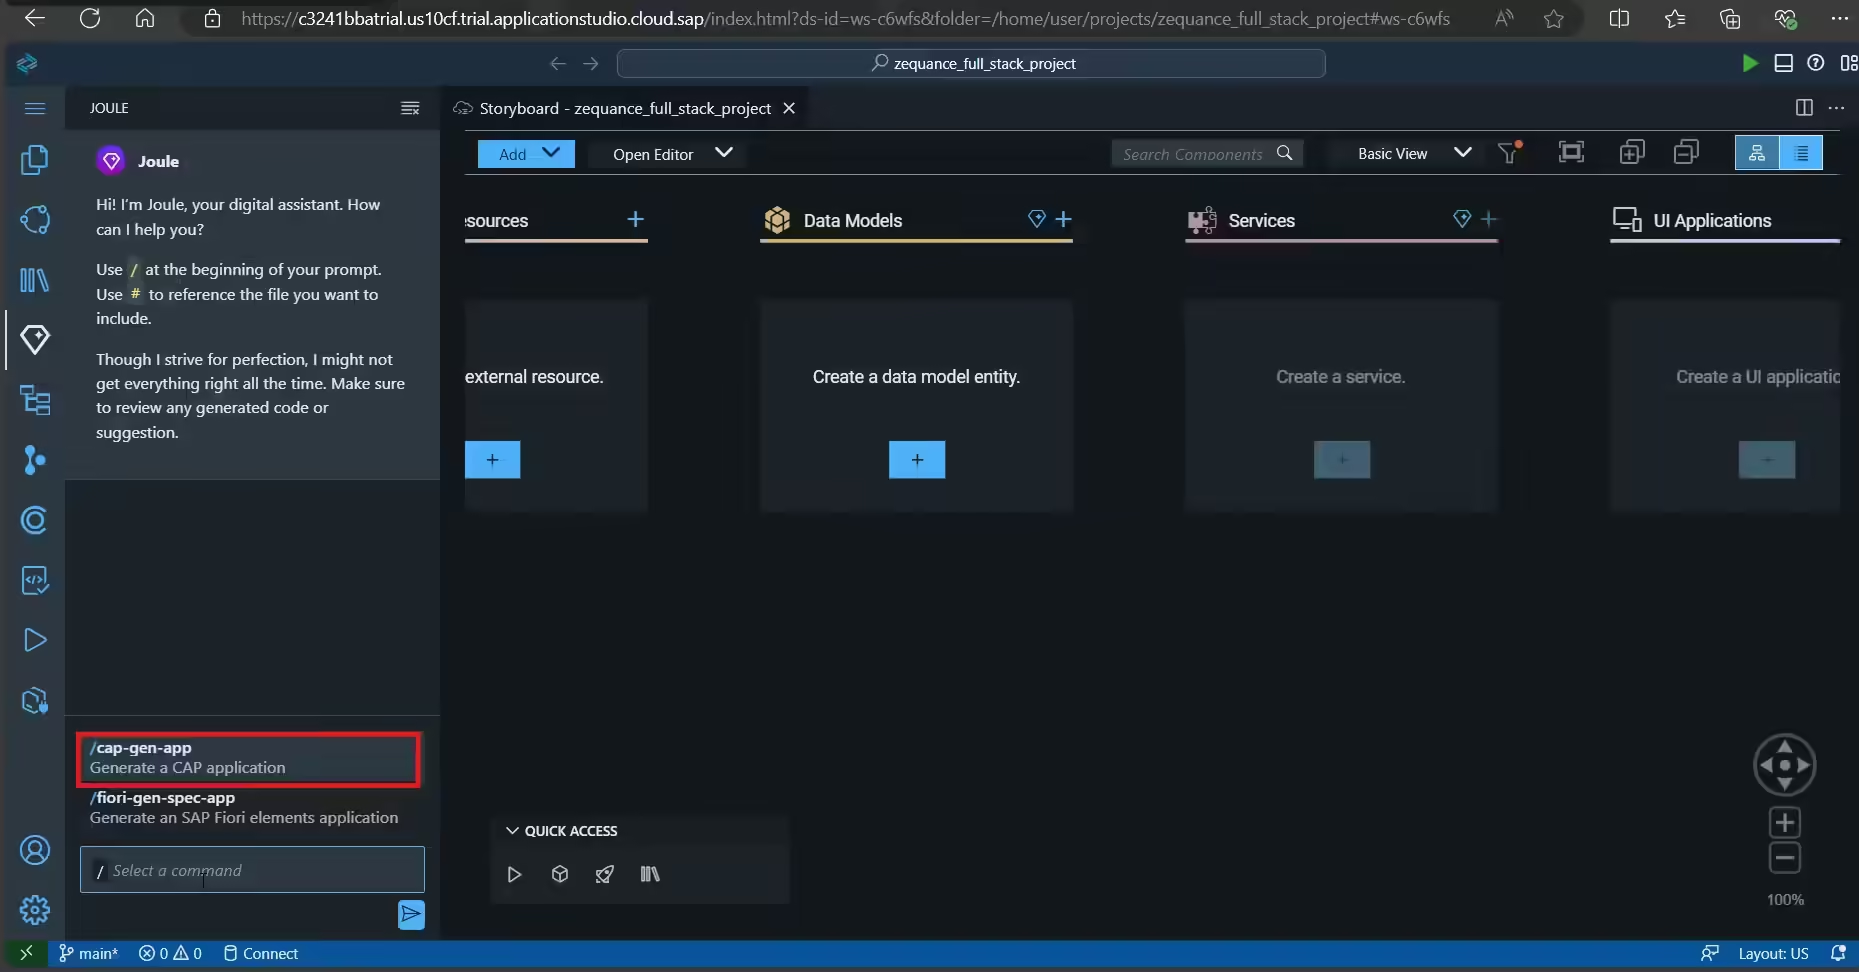
Step 16: Type “/” in the command section and select “cap-gen-app.“If Joule is throwing an error like “Joule is not enabled for you” follow these steps in SAP Community.
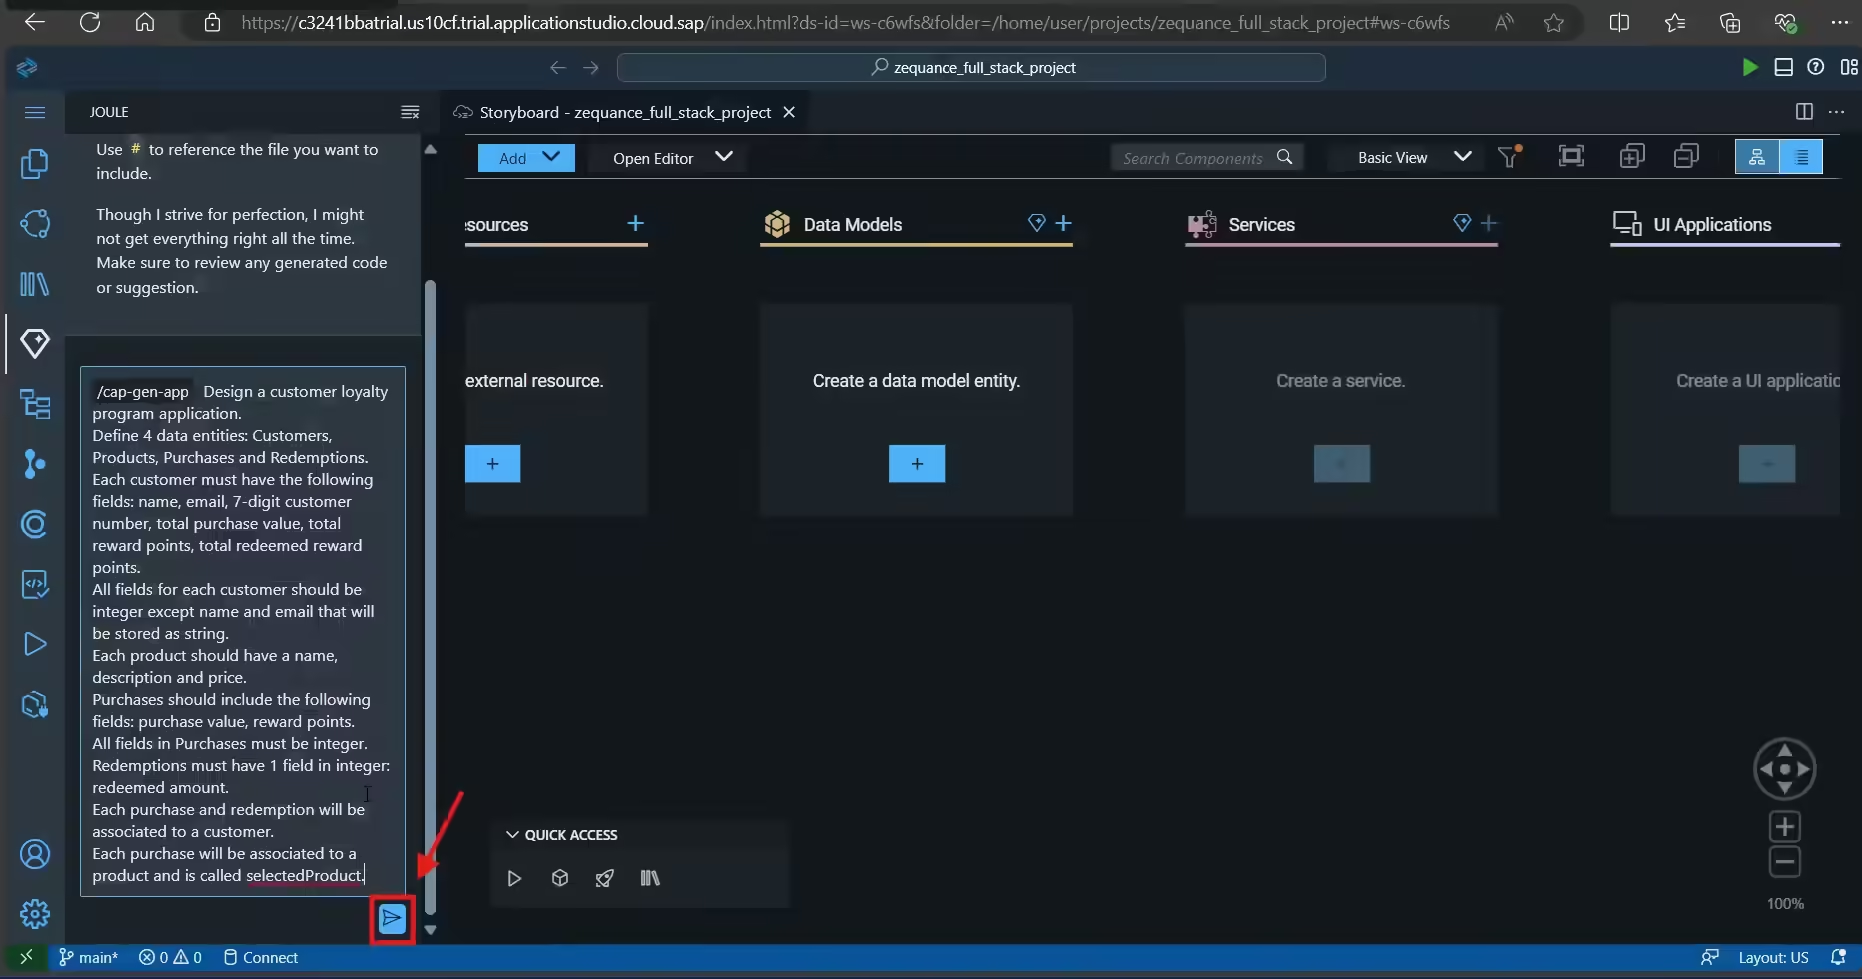
Step 17: Then, paste the below prompt and press send.
“Design a customer loyalty program application. Define 4 data entities: Customers, Products, Purchases and Redemptions. Each customer must have the following fields: name, email, 7-digit customer number, total purchase value, total reward points, total redeemed reward points. All fields for each customer should be integer except name and email that will be stored as string. Each product should have a name, description and price. Purchases should include the following fields: purchase value, reward points. All fields in Purchases must be integer. Redemptions must have 1 field in integer: redeemed amount. Each purchase and redemption will be associated to a customer. Each purchase will be associated to a product and is called selectedProduct. “
Step 18: Click on Accept . 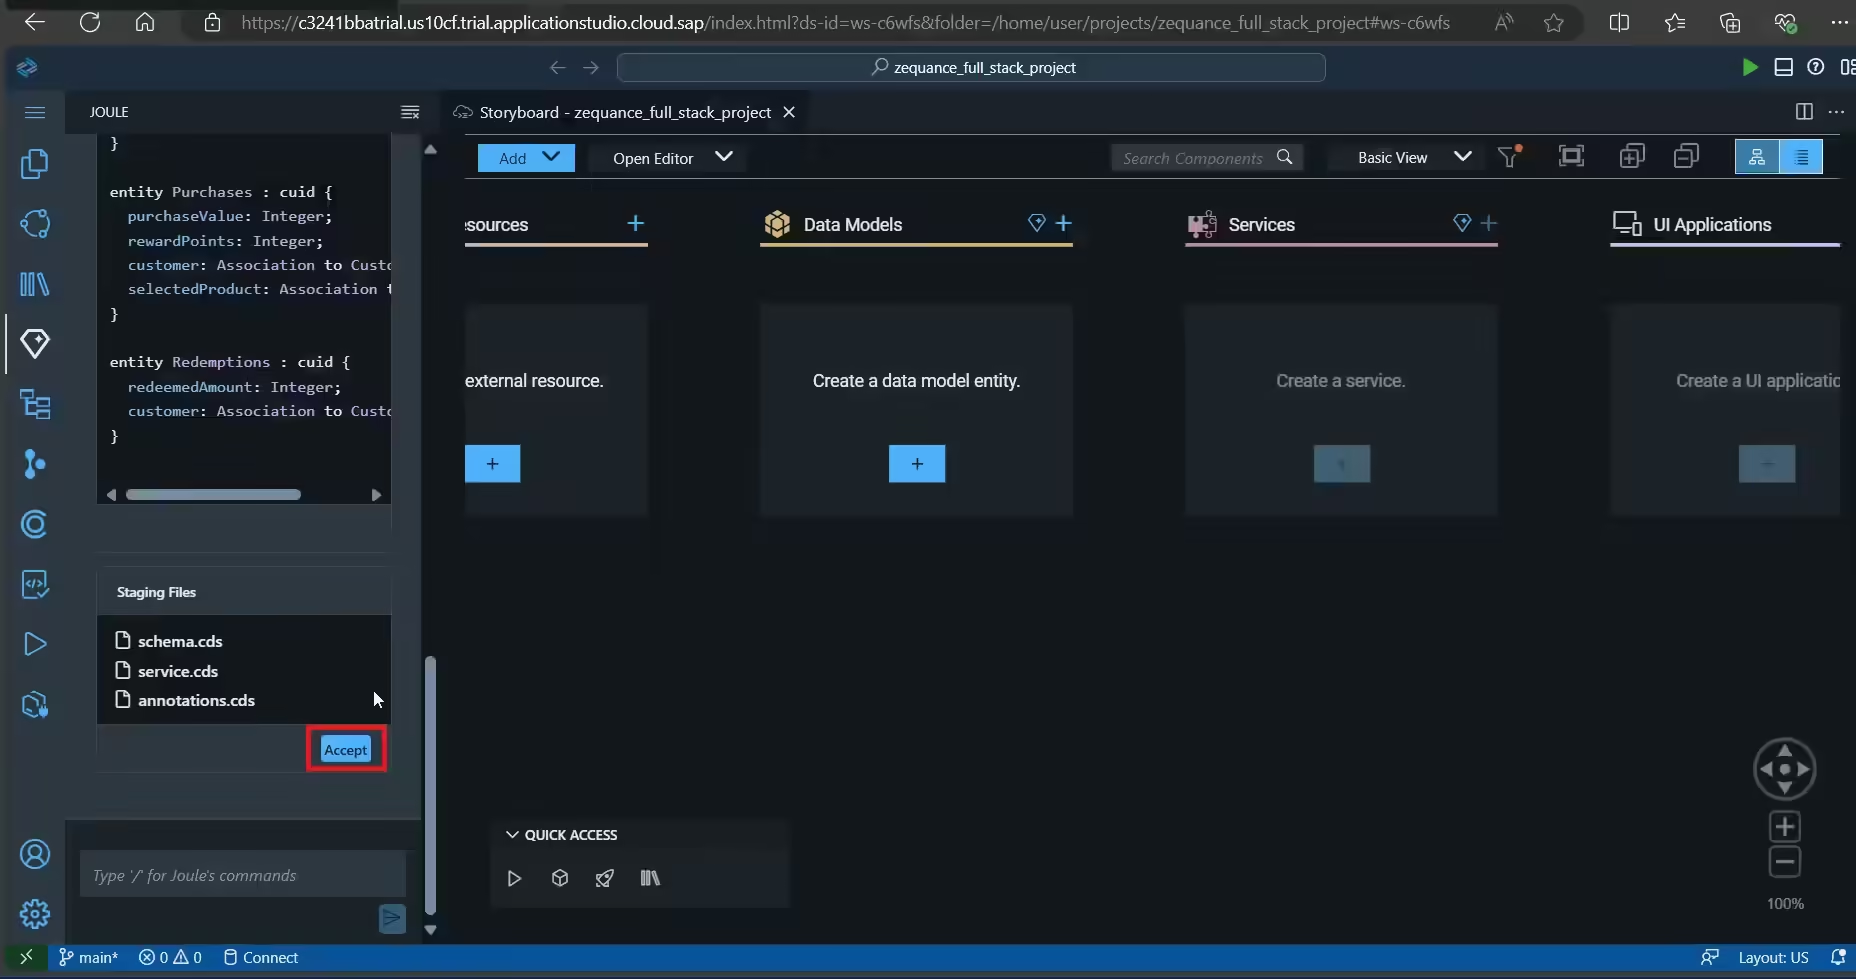
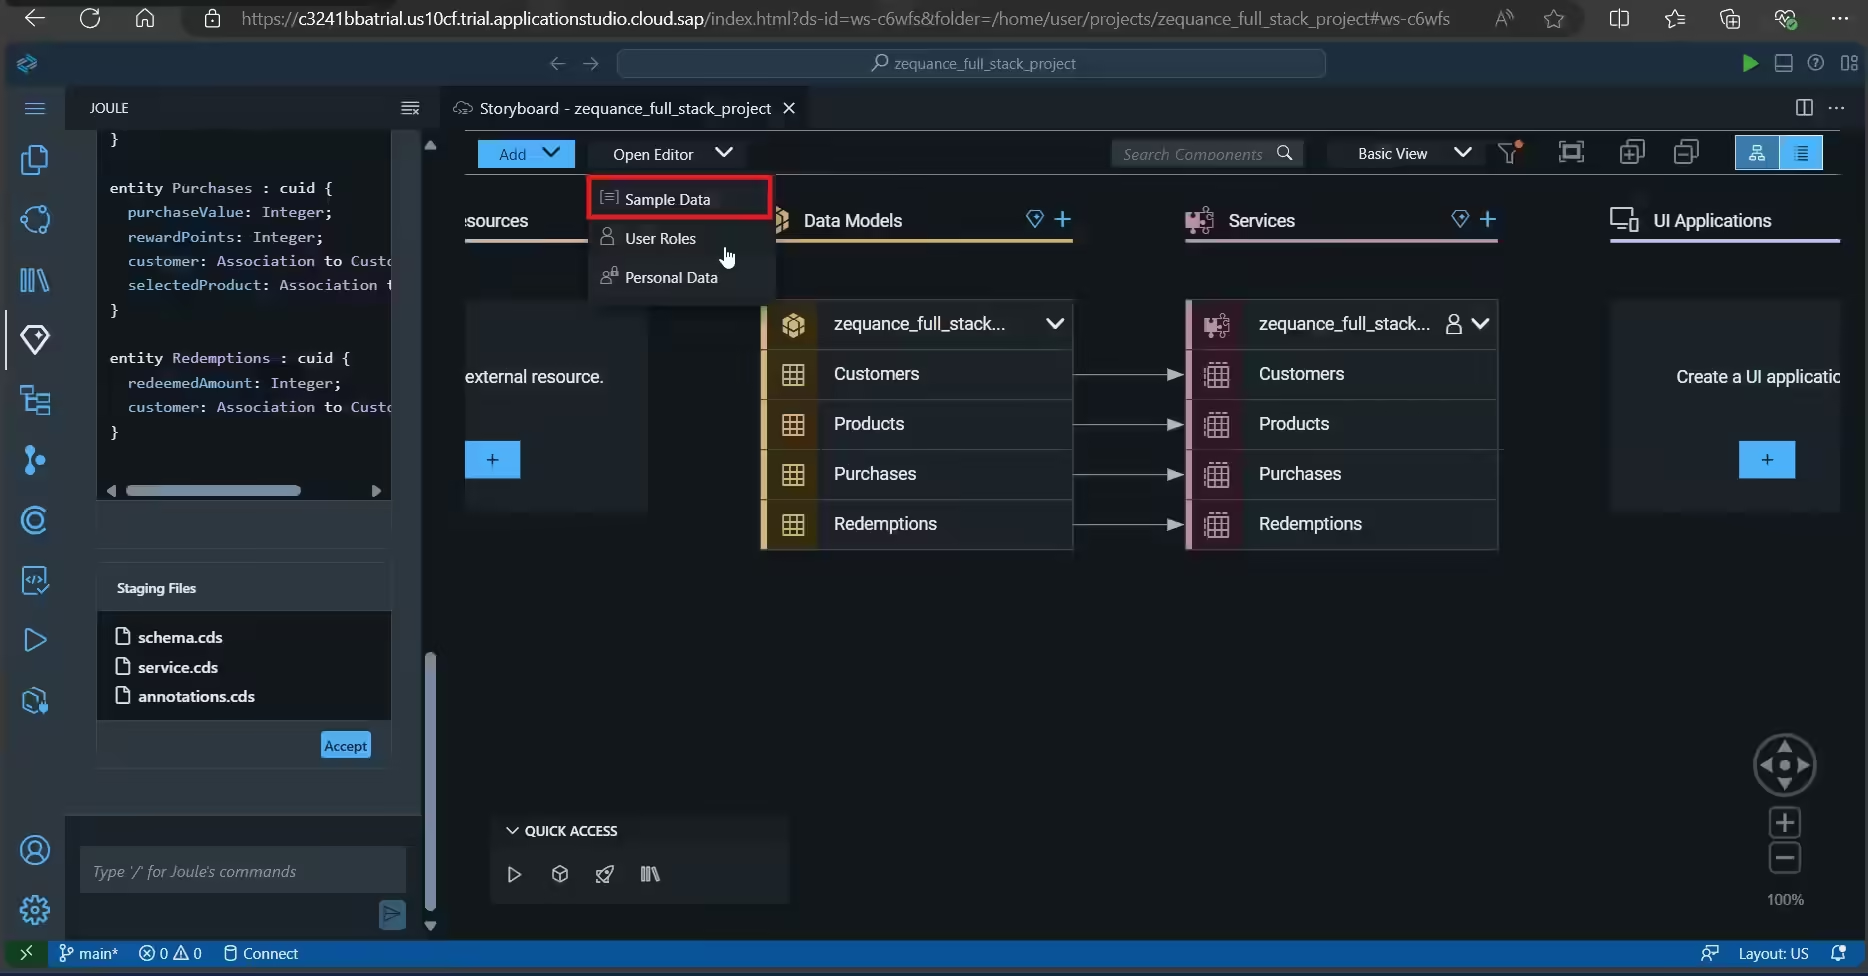
Step 19: The screen will get updated once the prompt is executed. Then choose Open Editor. And select Sample Data.
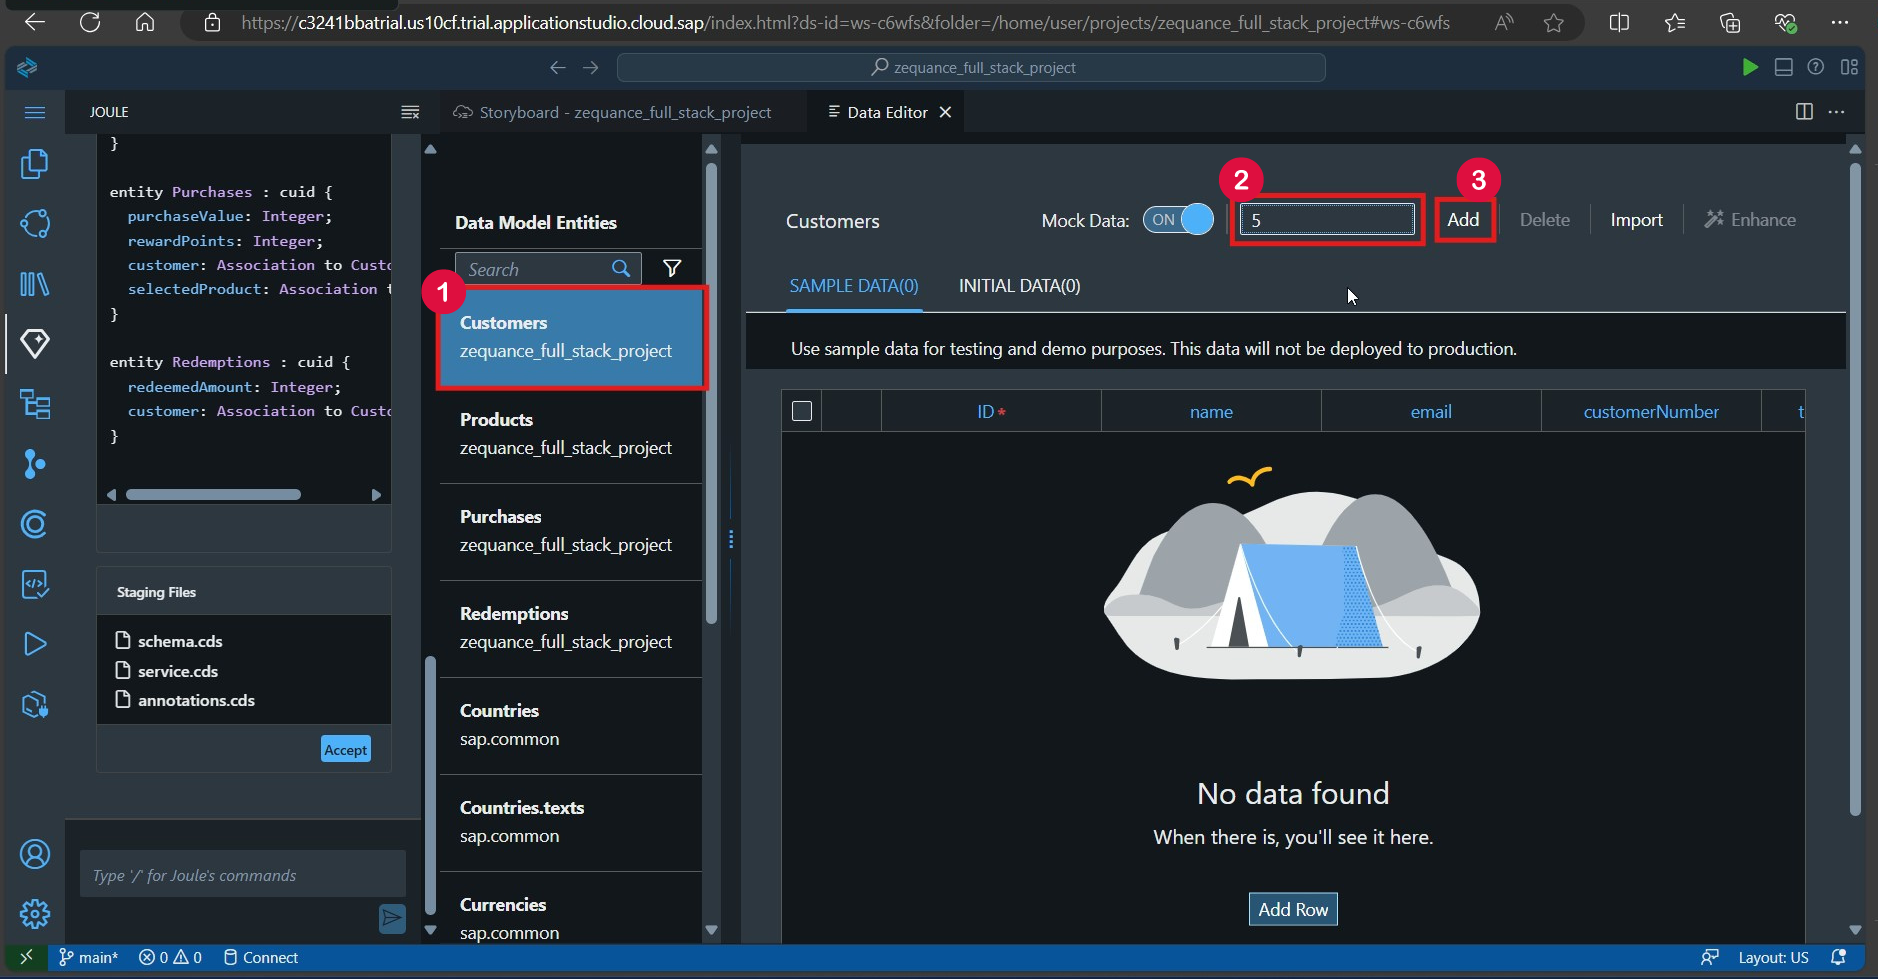
Step 20:Choose Customers and Value 5 and press on Add. It will create 5 sample records for customer data.
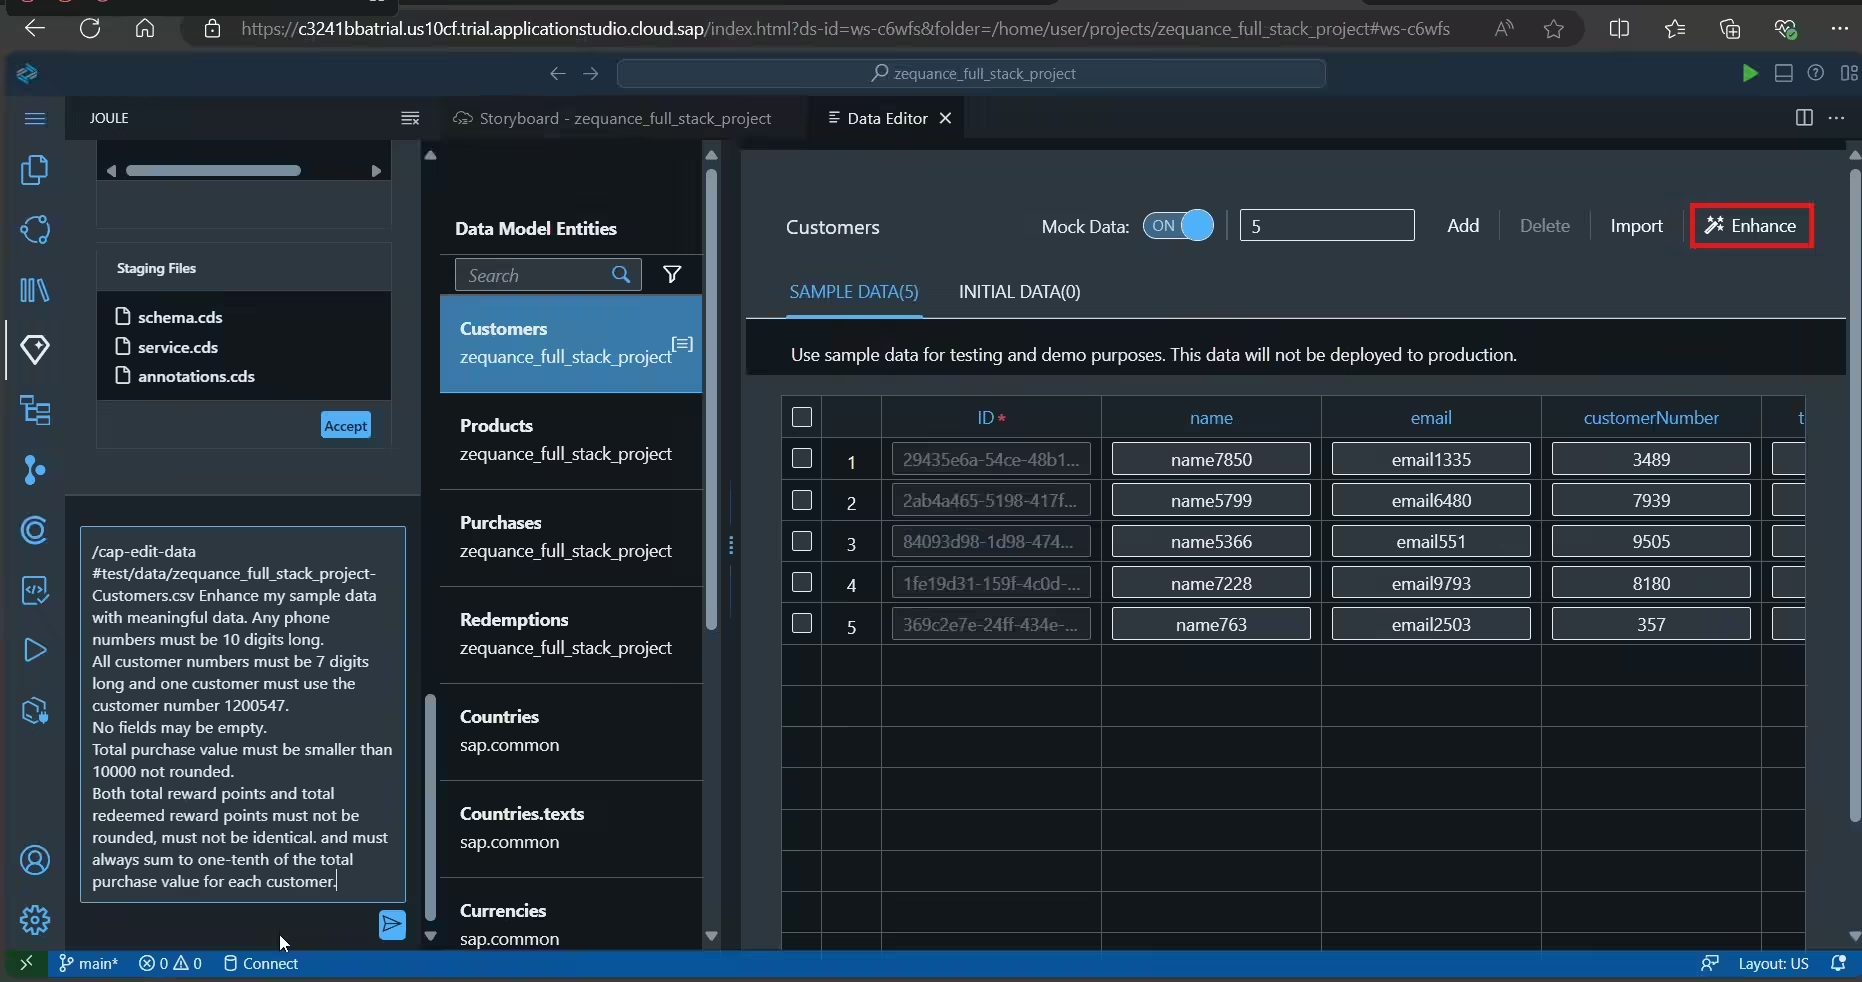
Step 21: Click on Enhance.
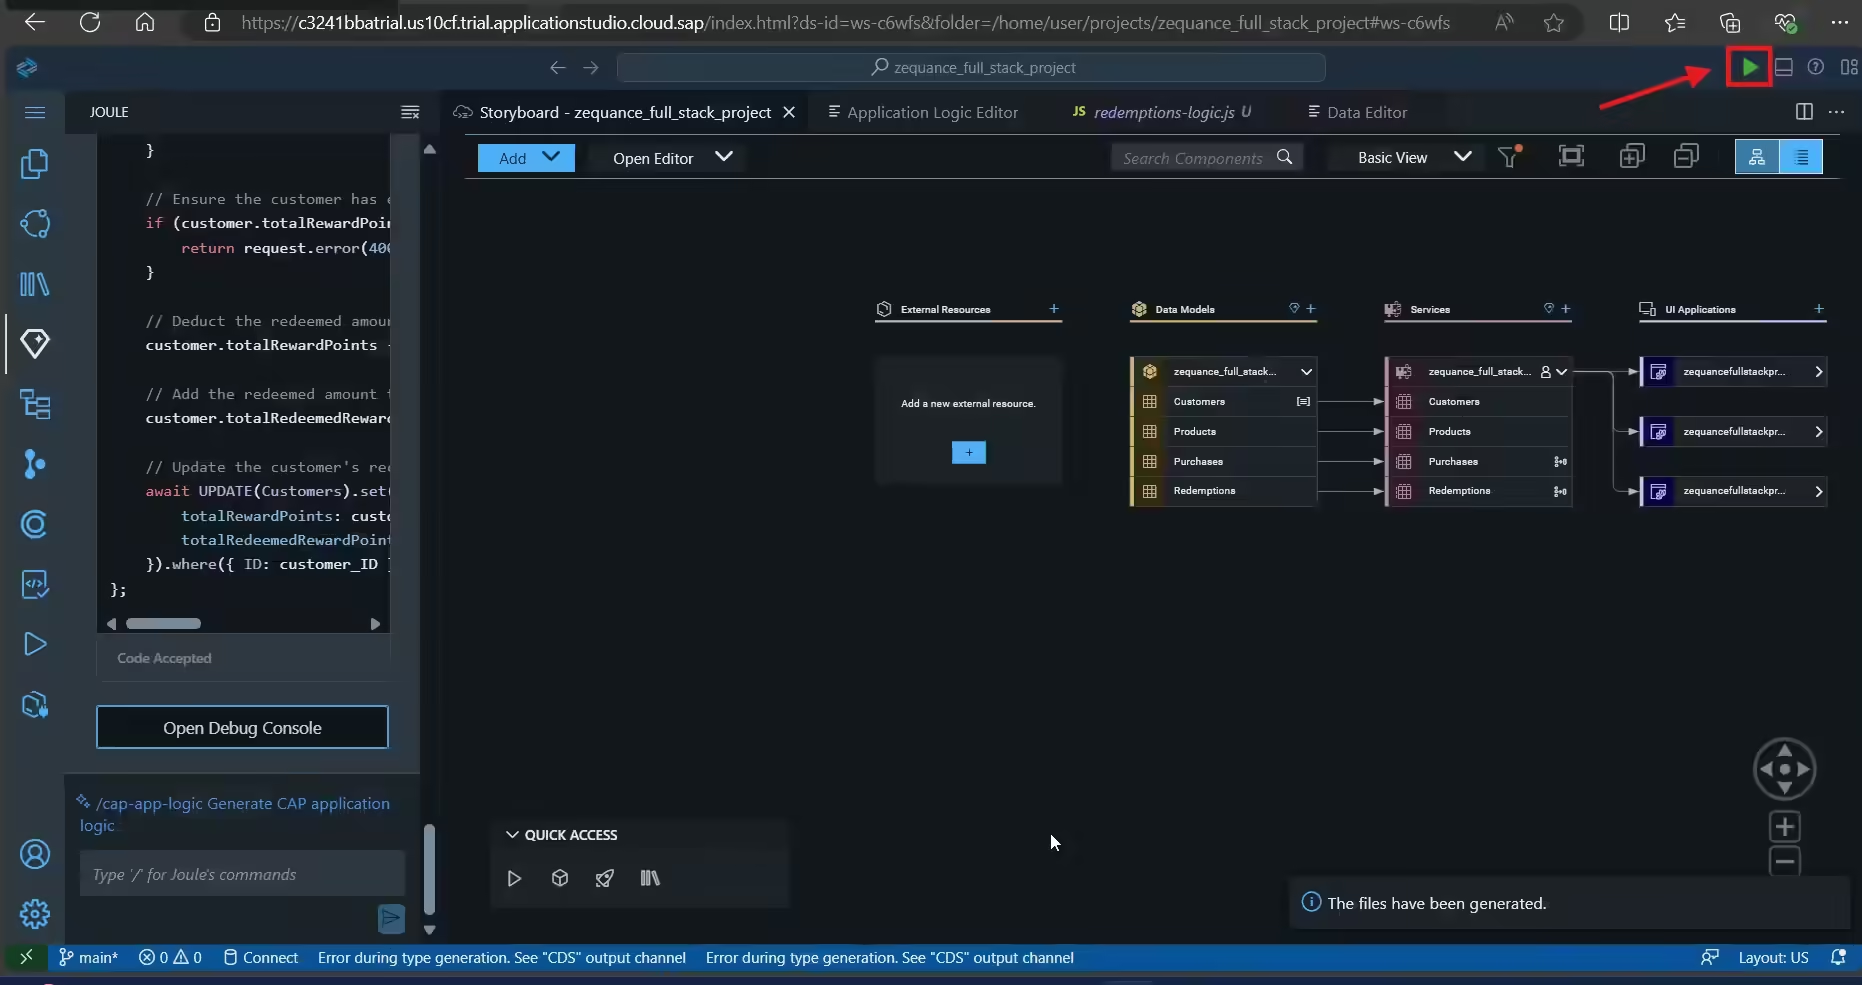
Step 22: Next, click on StoryBoard.

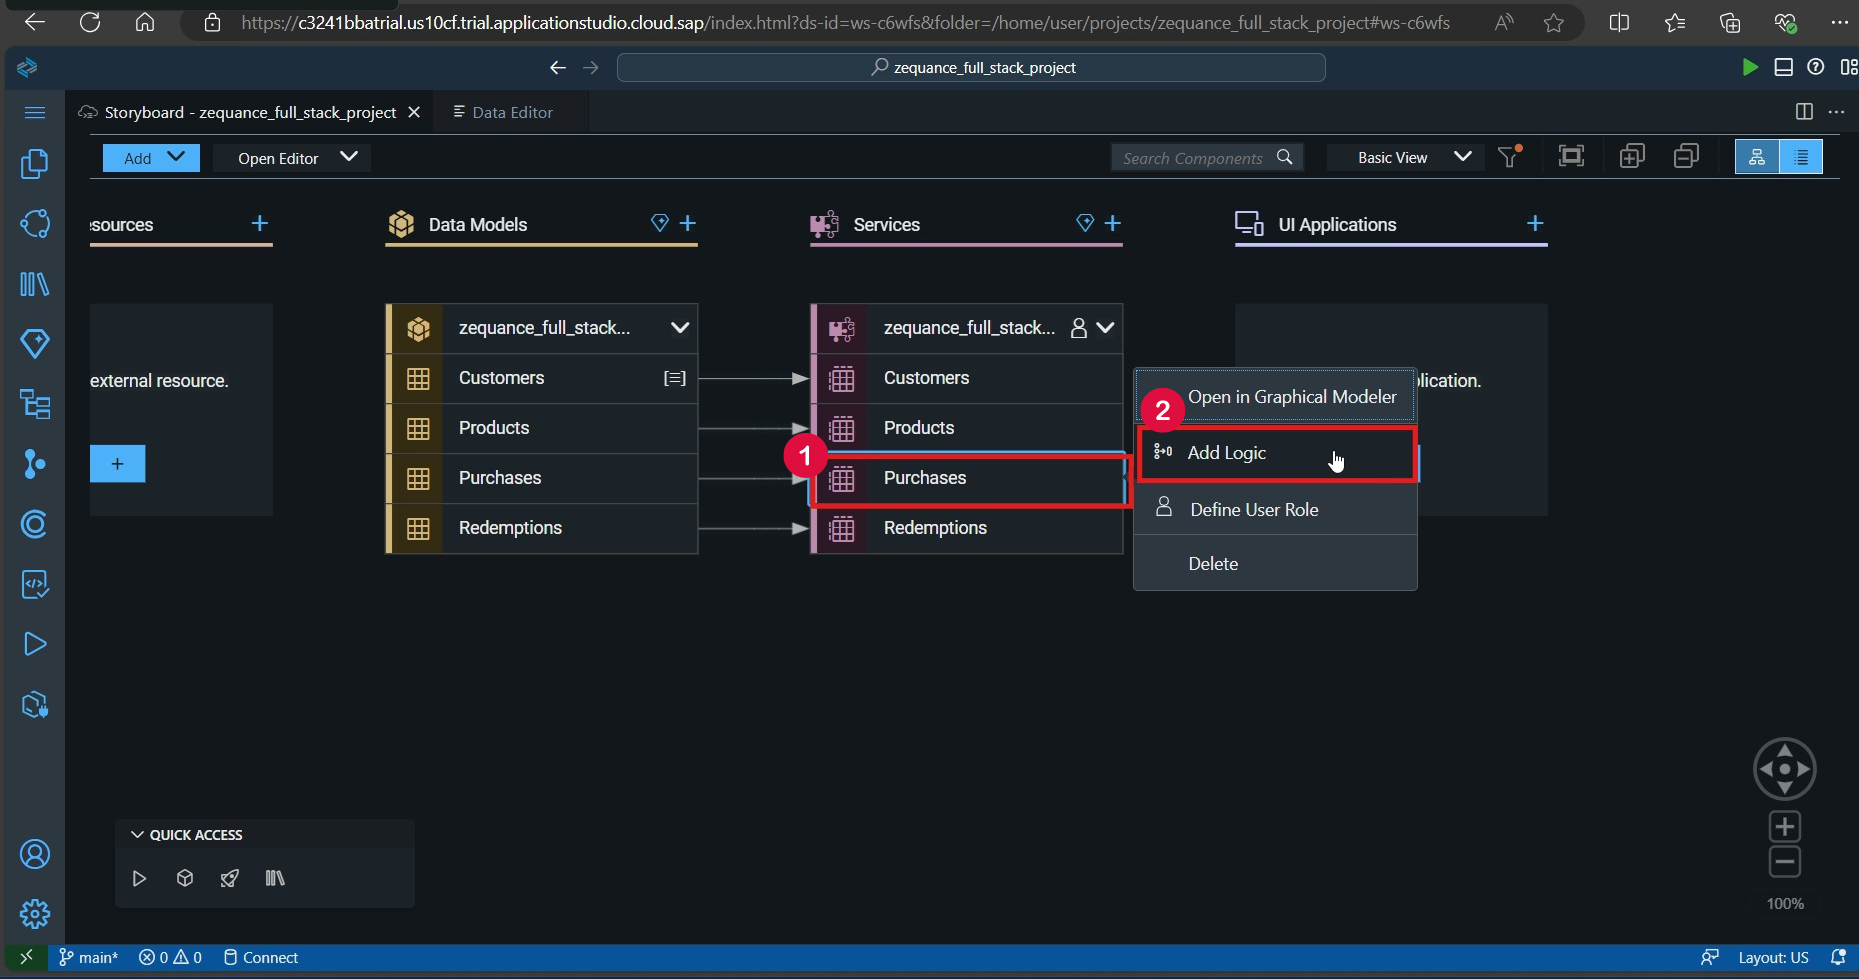
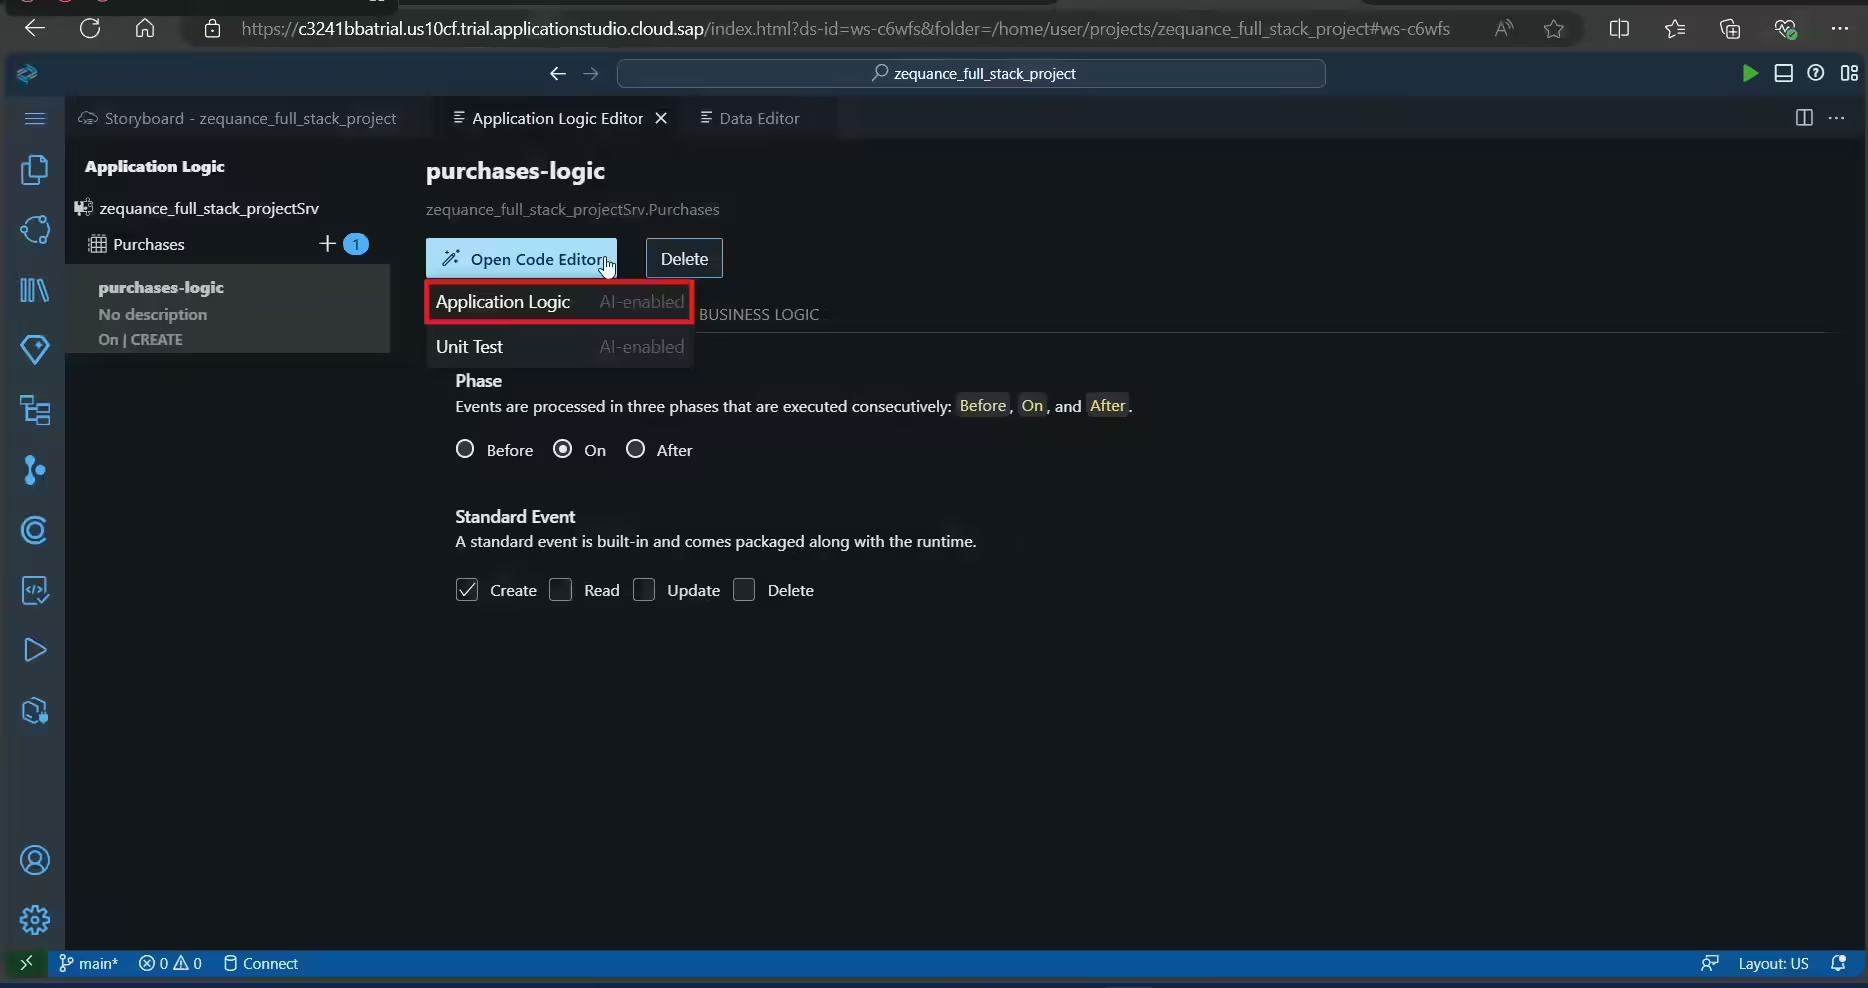
Step 23: And select Purchases > Add logic.
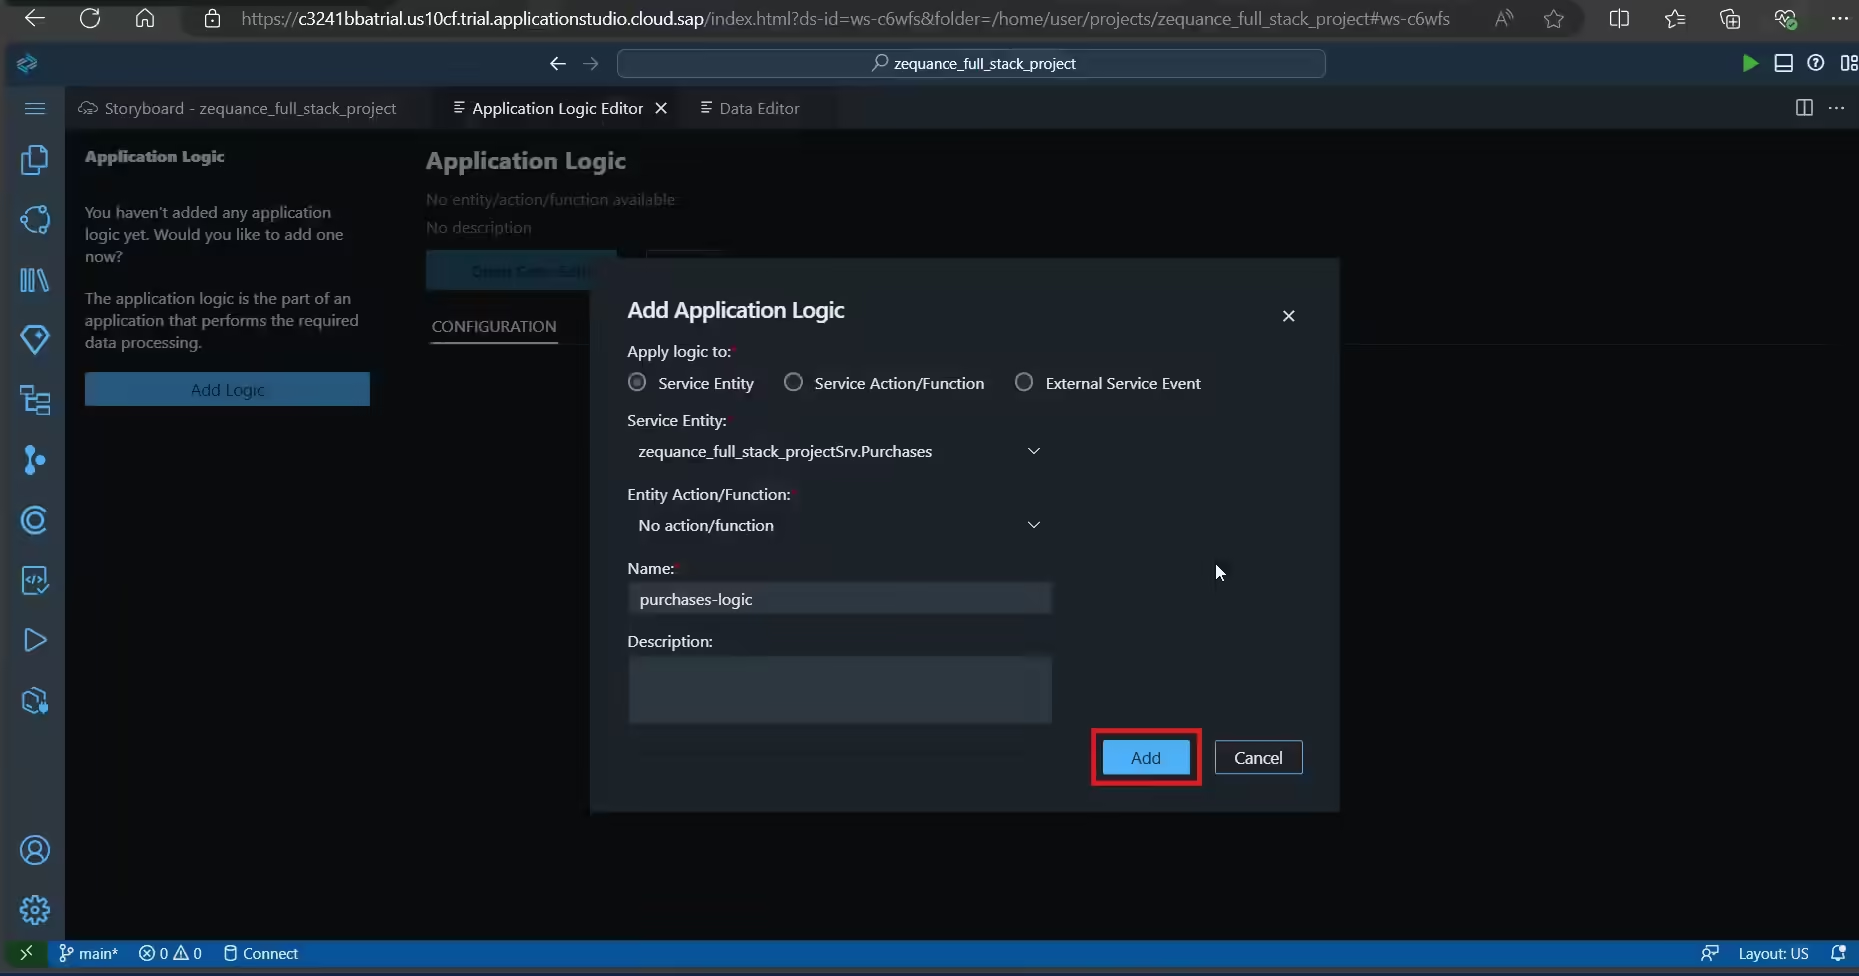
Step 24: Click on Add.
Step 25: Then, choose on Open Code Editor > Application Logic.
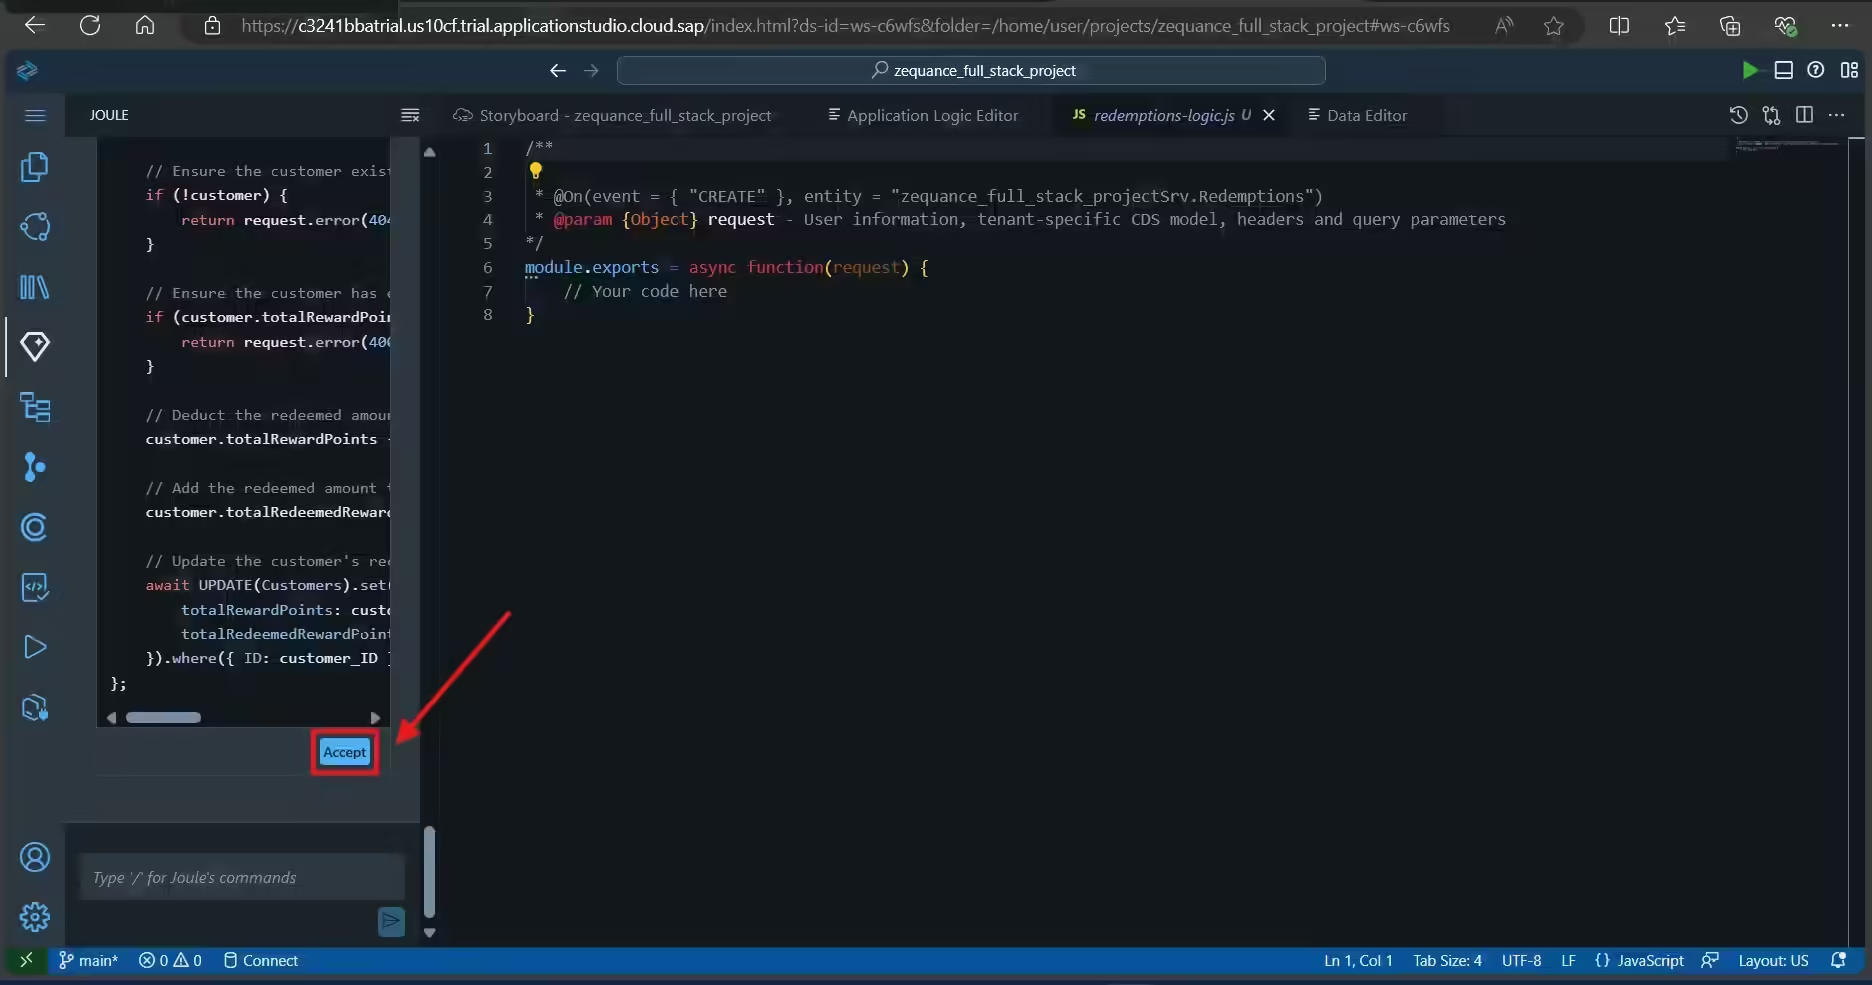
Step 26: Copy the below prompt and paste it into the text field as given below press the send button. It will send the prompt to Joule to process.
“Reward points of each purchase will be the one tenth of the purchase value. Each purchase value will be added to the total purchase value of the related customer. Each reward point will be added to the total reward points of the related customer.”

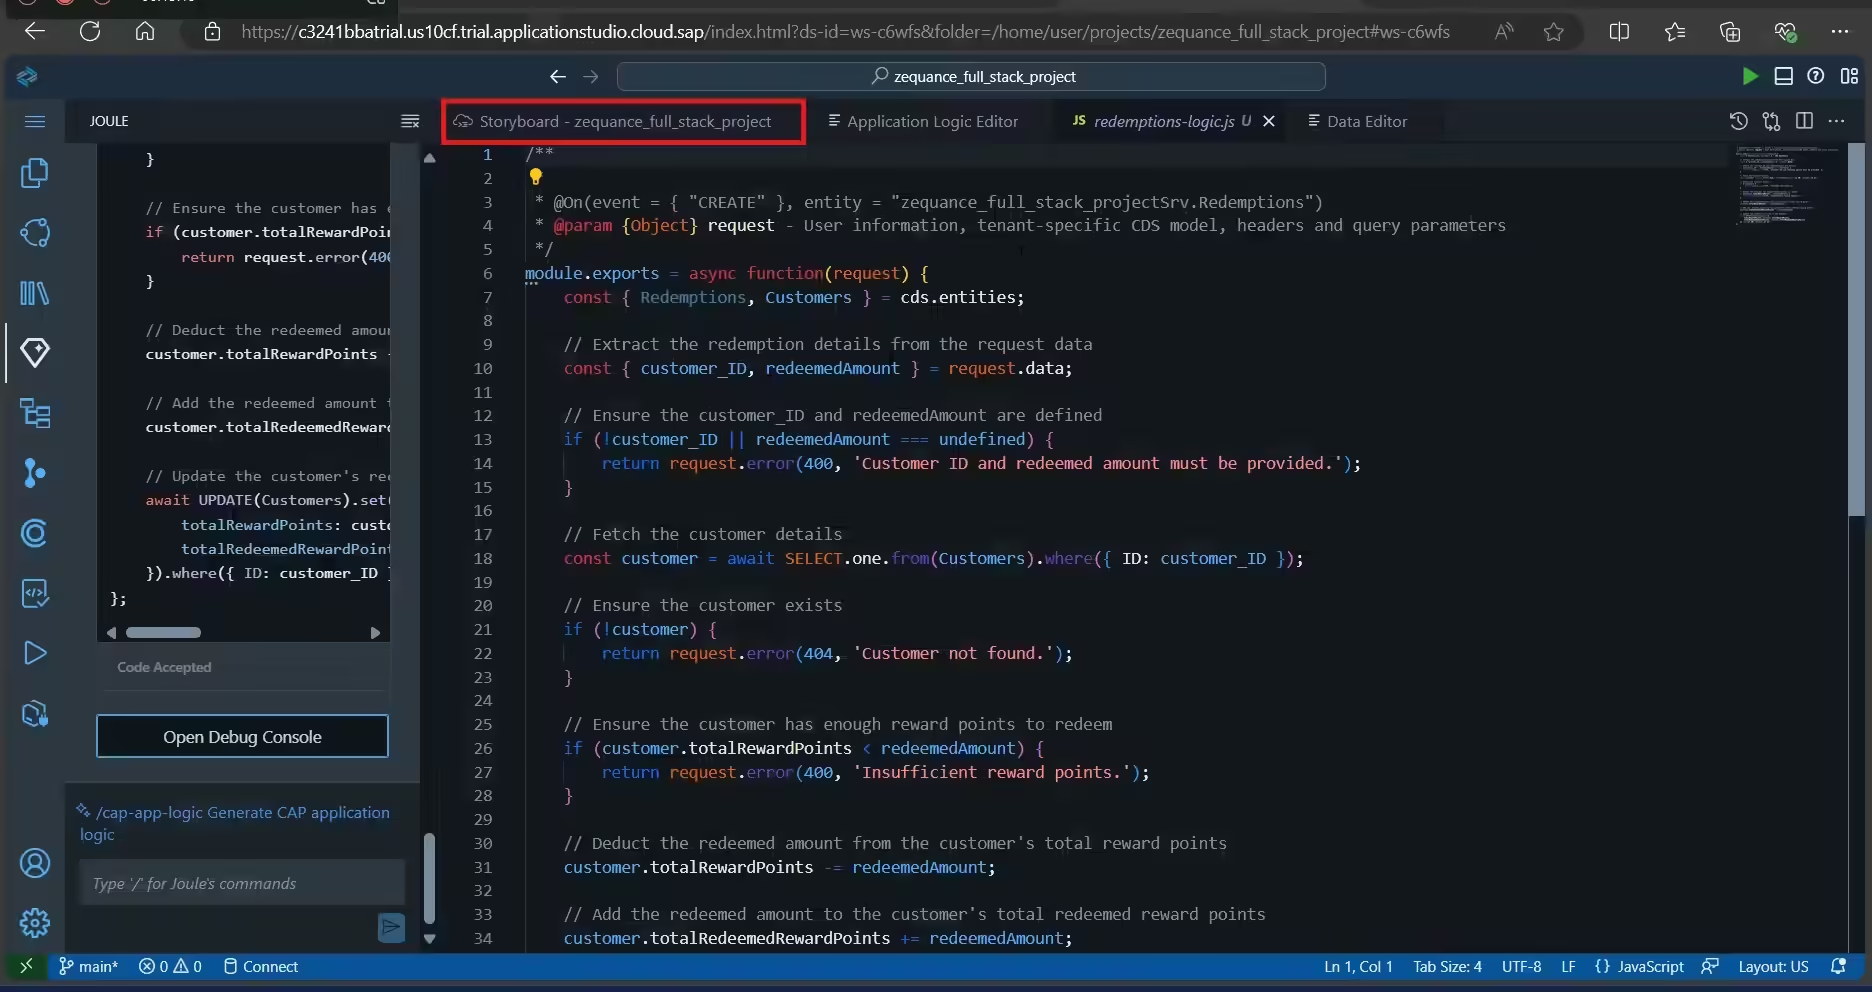
Step 27: Click on Accept.
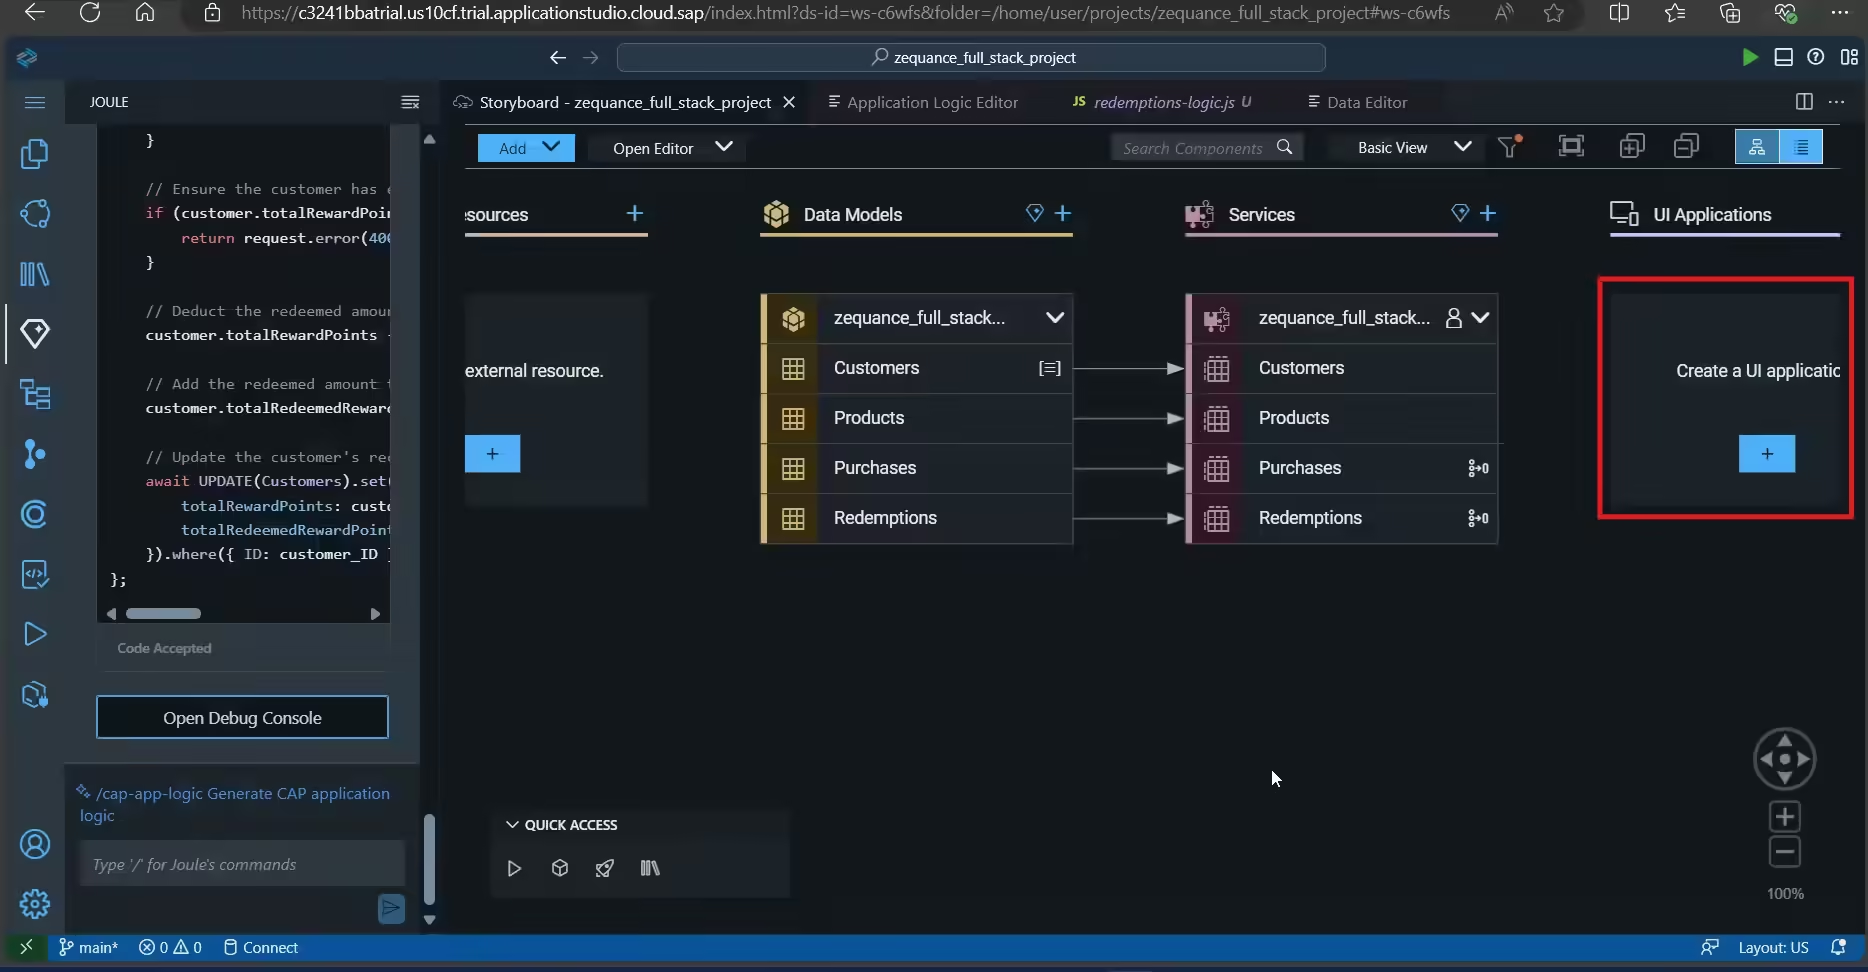
Step 28: Then, choose StoryBoard.
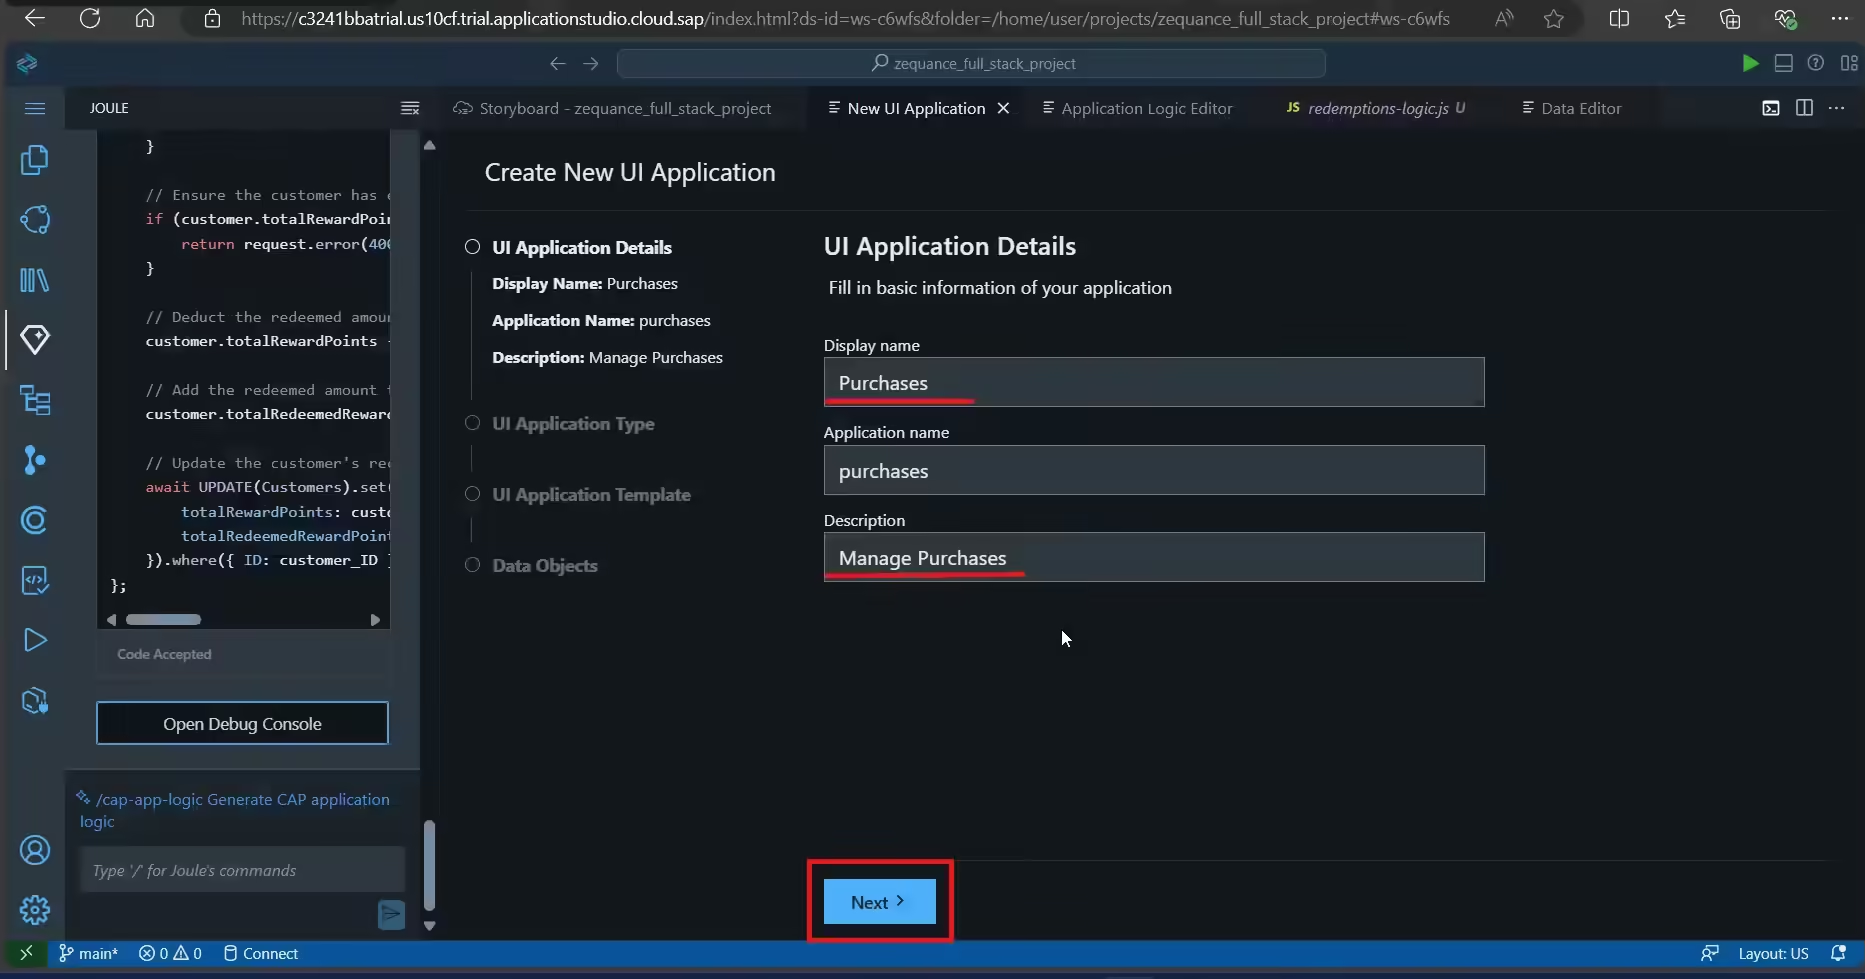
Step 29: And, select Create a UI application.
Step 30: Fill in the text fields as follows:
Display name: Purchases
Description: Manage Purchases
Then, click Next.
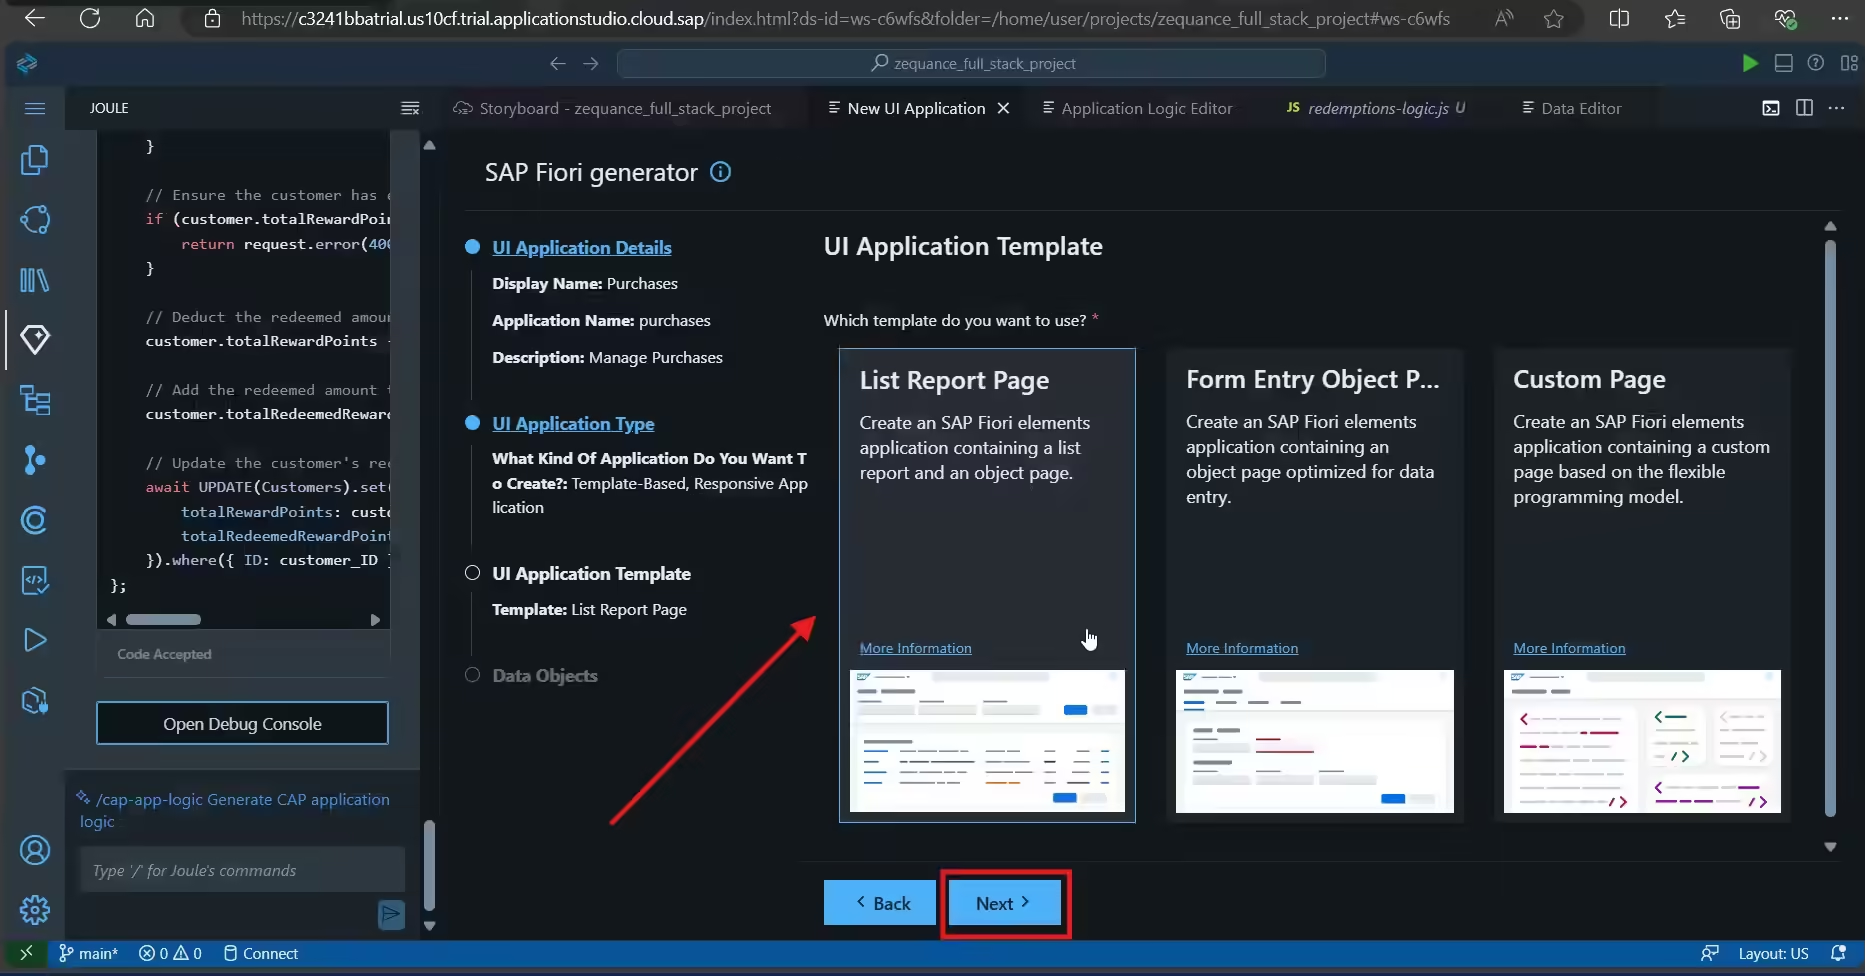
Step 31: Choose Templete-Based. And, click Next.

Step 32: Choose List report page. Click Next.
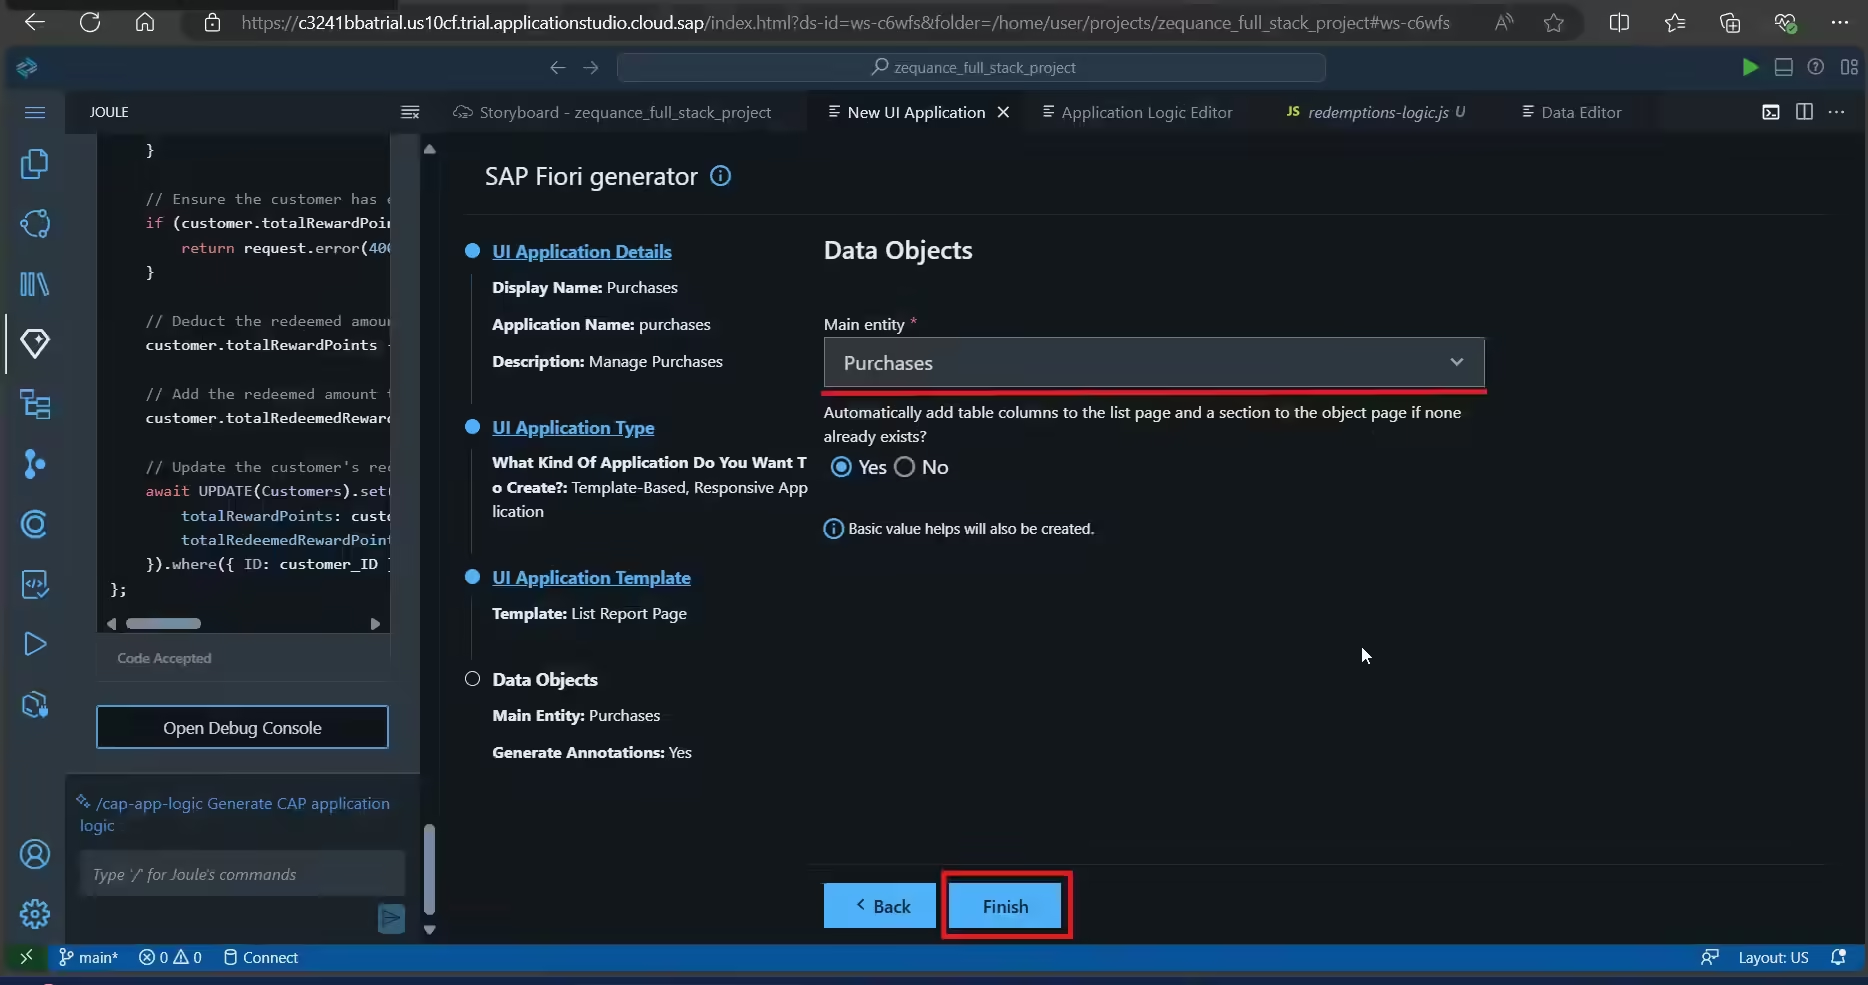
Step 33: Choose main entity as Purchases. Click on Finish.
Repeat steps 29-33 to create additional UI apps for the Customers and the Redemptions.
Details to be filled for Customer and Redemptions is given below:
Customer:
- Display name: Customers
- Description: Manage Customers
- UI Application type: Template-Based Responsive Application
- UI Application Template: List Report Page
- Main Entity: Customers
Redemptions:
- Display name: Redemptions
- Description: Manage Redemptions
- UI Application type: Template-Based Responsive Application
- UI Application Template: List Report Page
- Main Entity: Redemptions
Step 35: Fantastic! We’re ready to test the app. To test the application click on Run and Debug button.
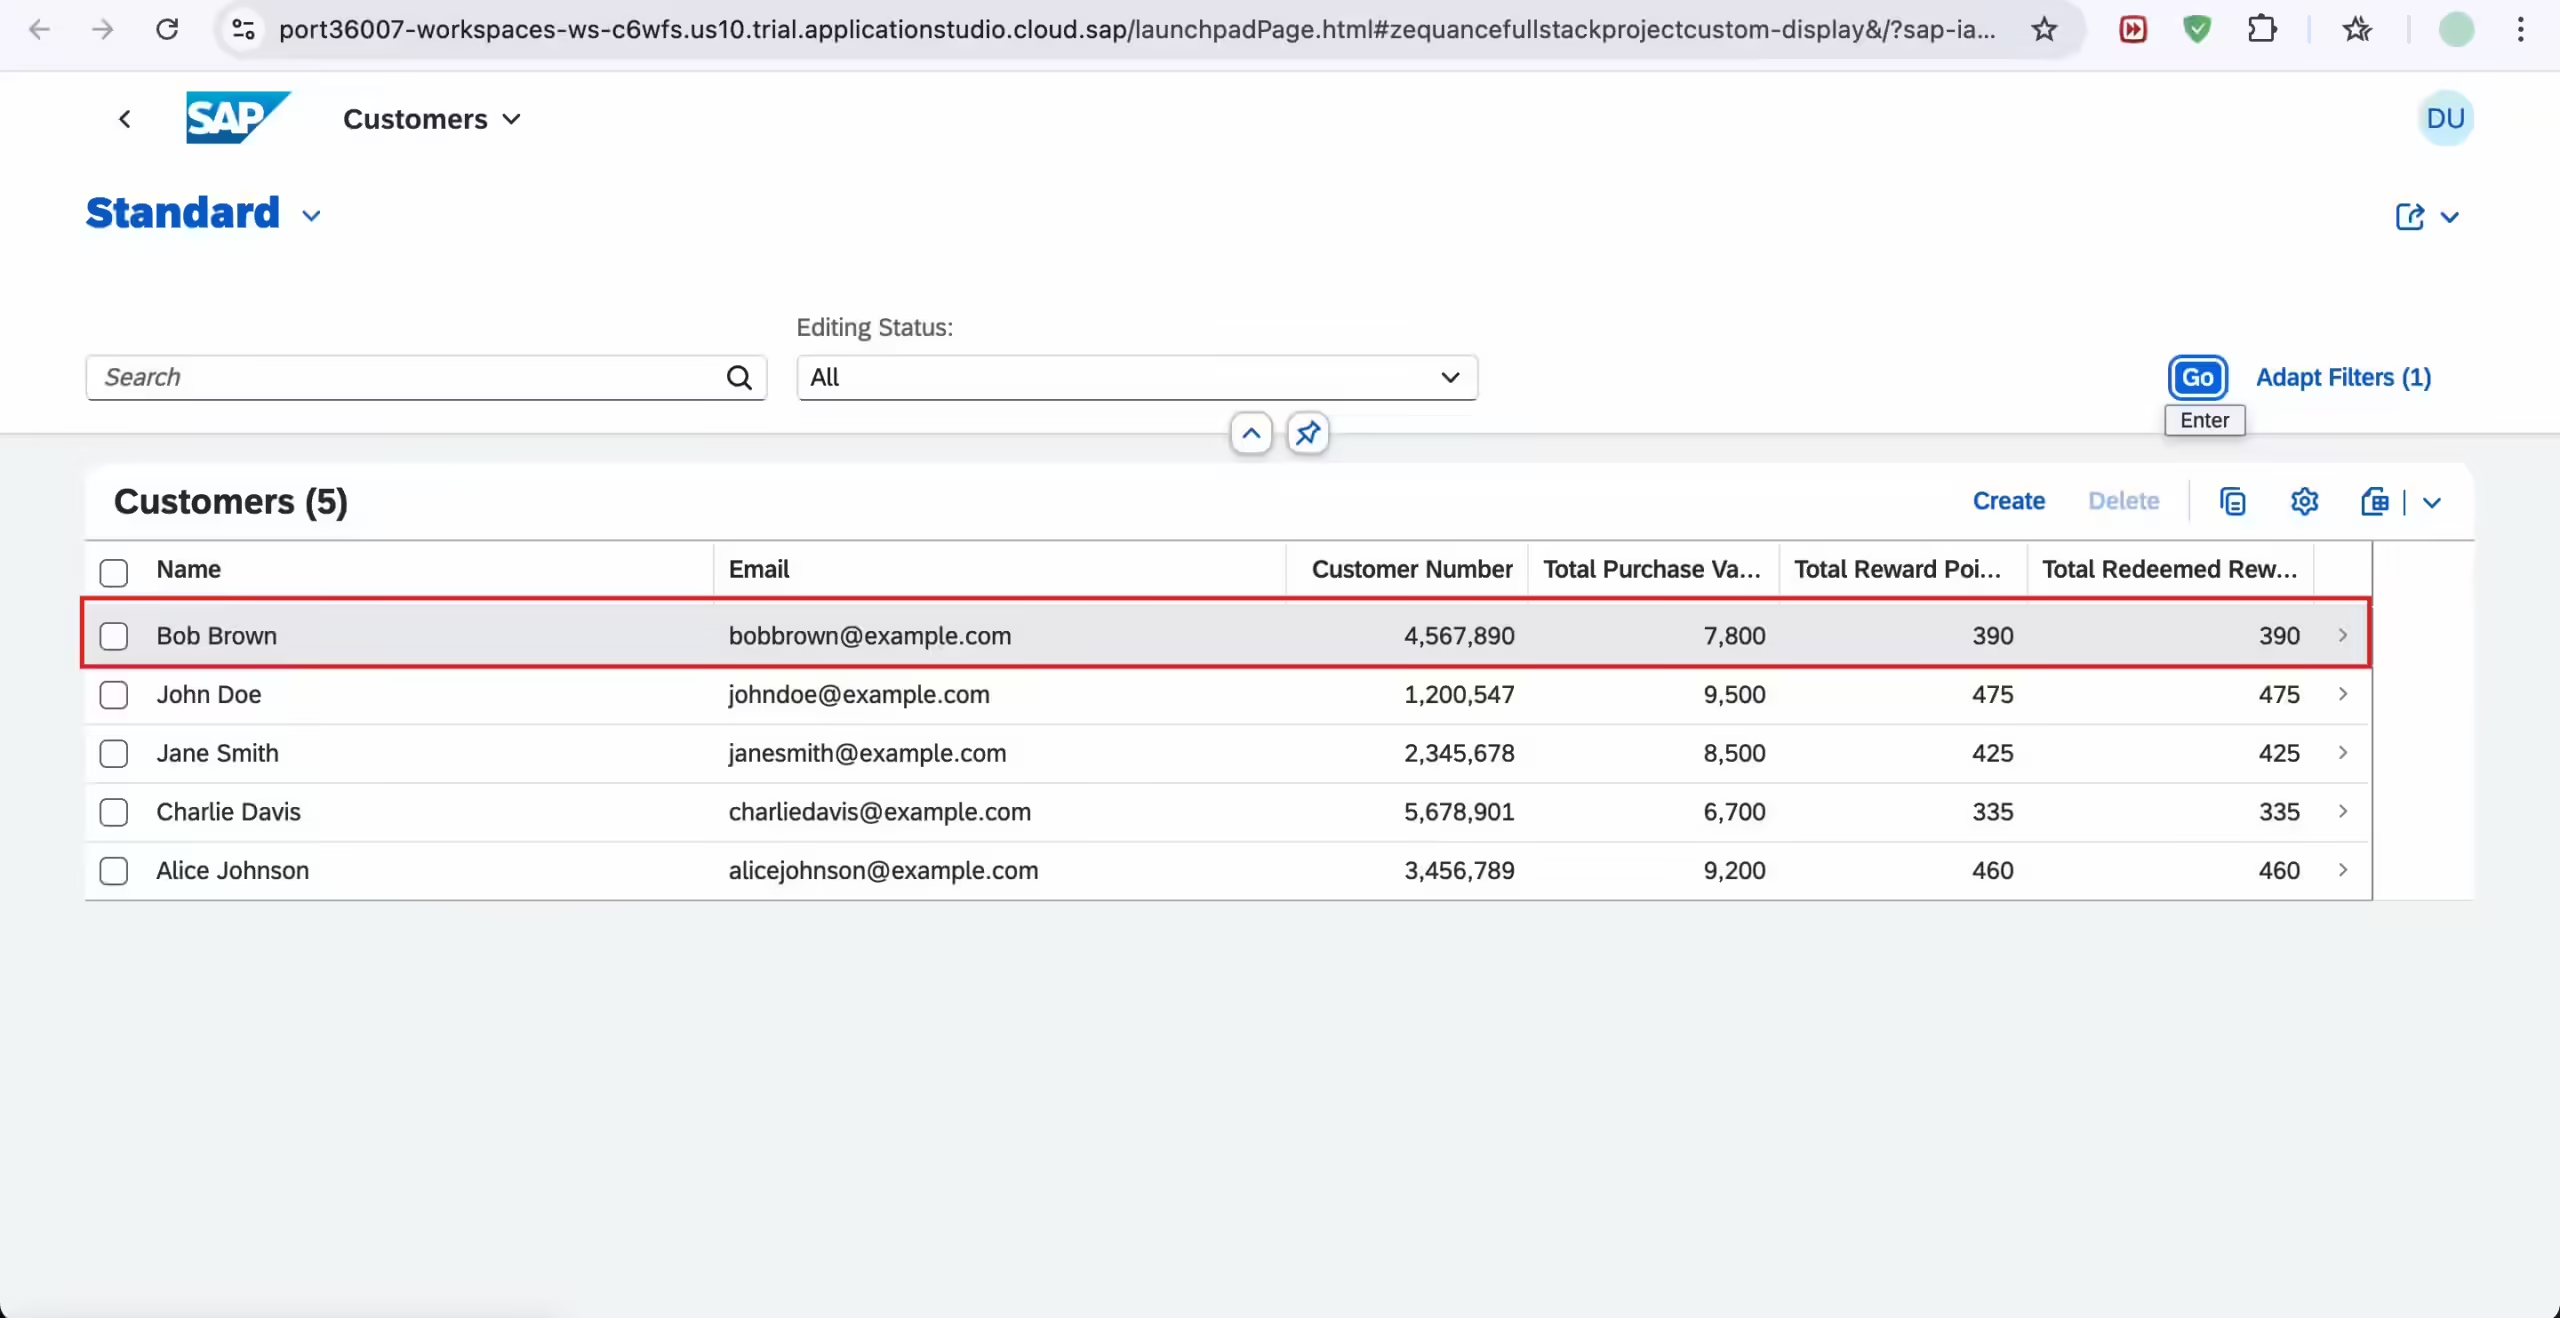
A new tab opens. Click on Customers > Go.

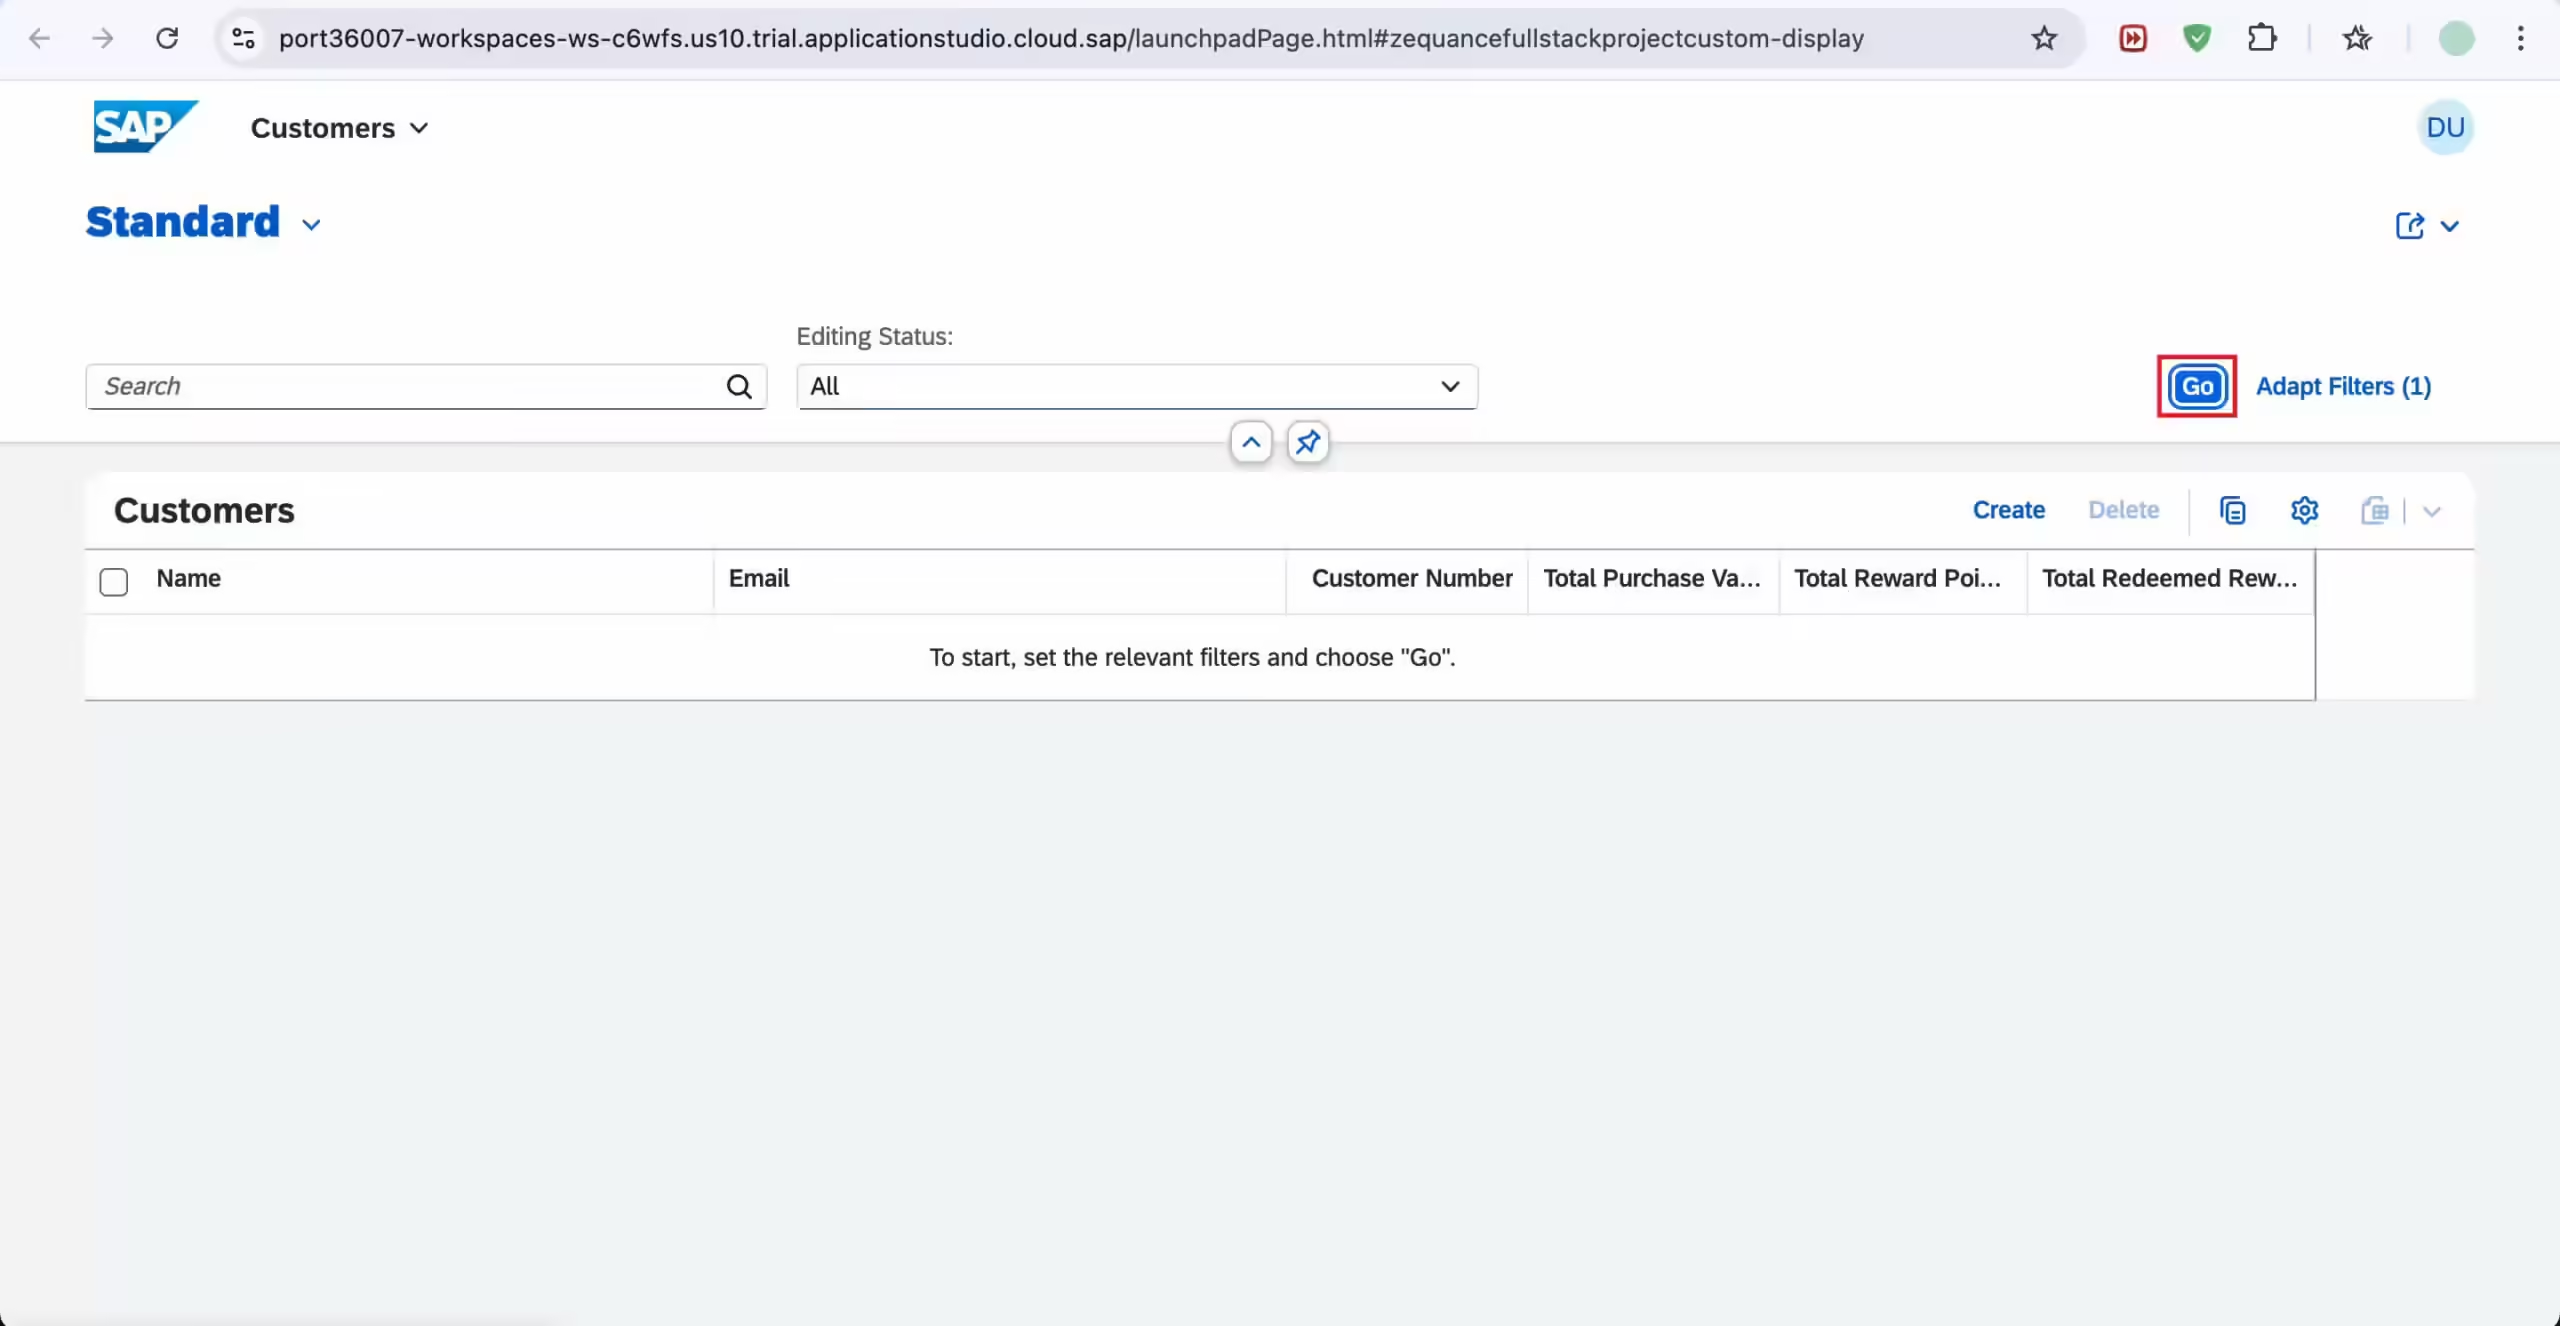
It will open the list of customer data. Choose any one of the customers to test the edit function.
Click on the “Edit” and change Name and Email as given below, and Save.

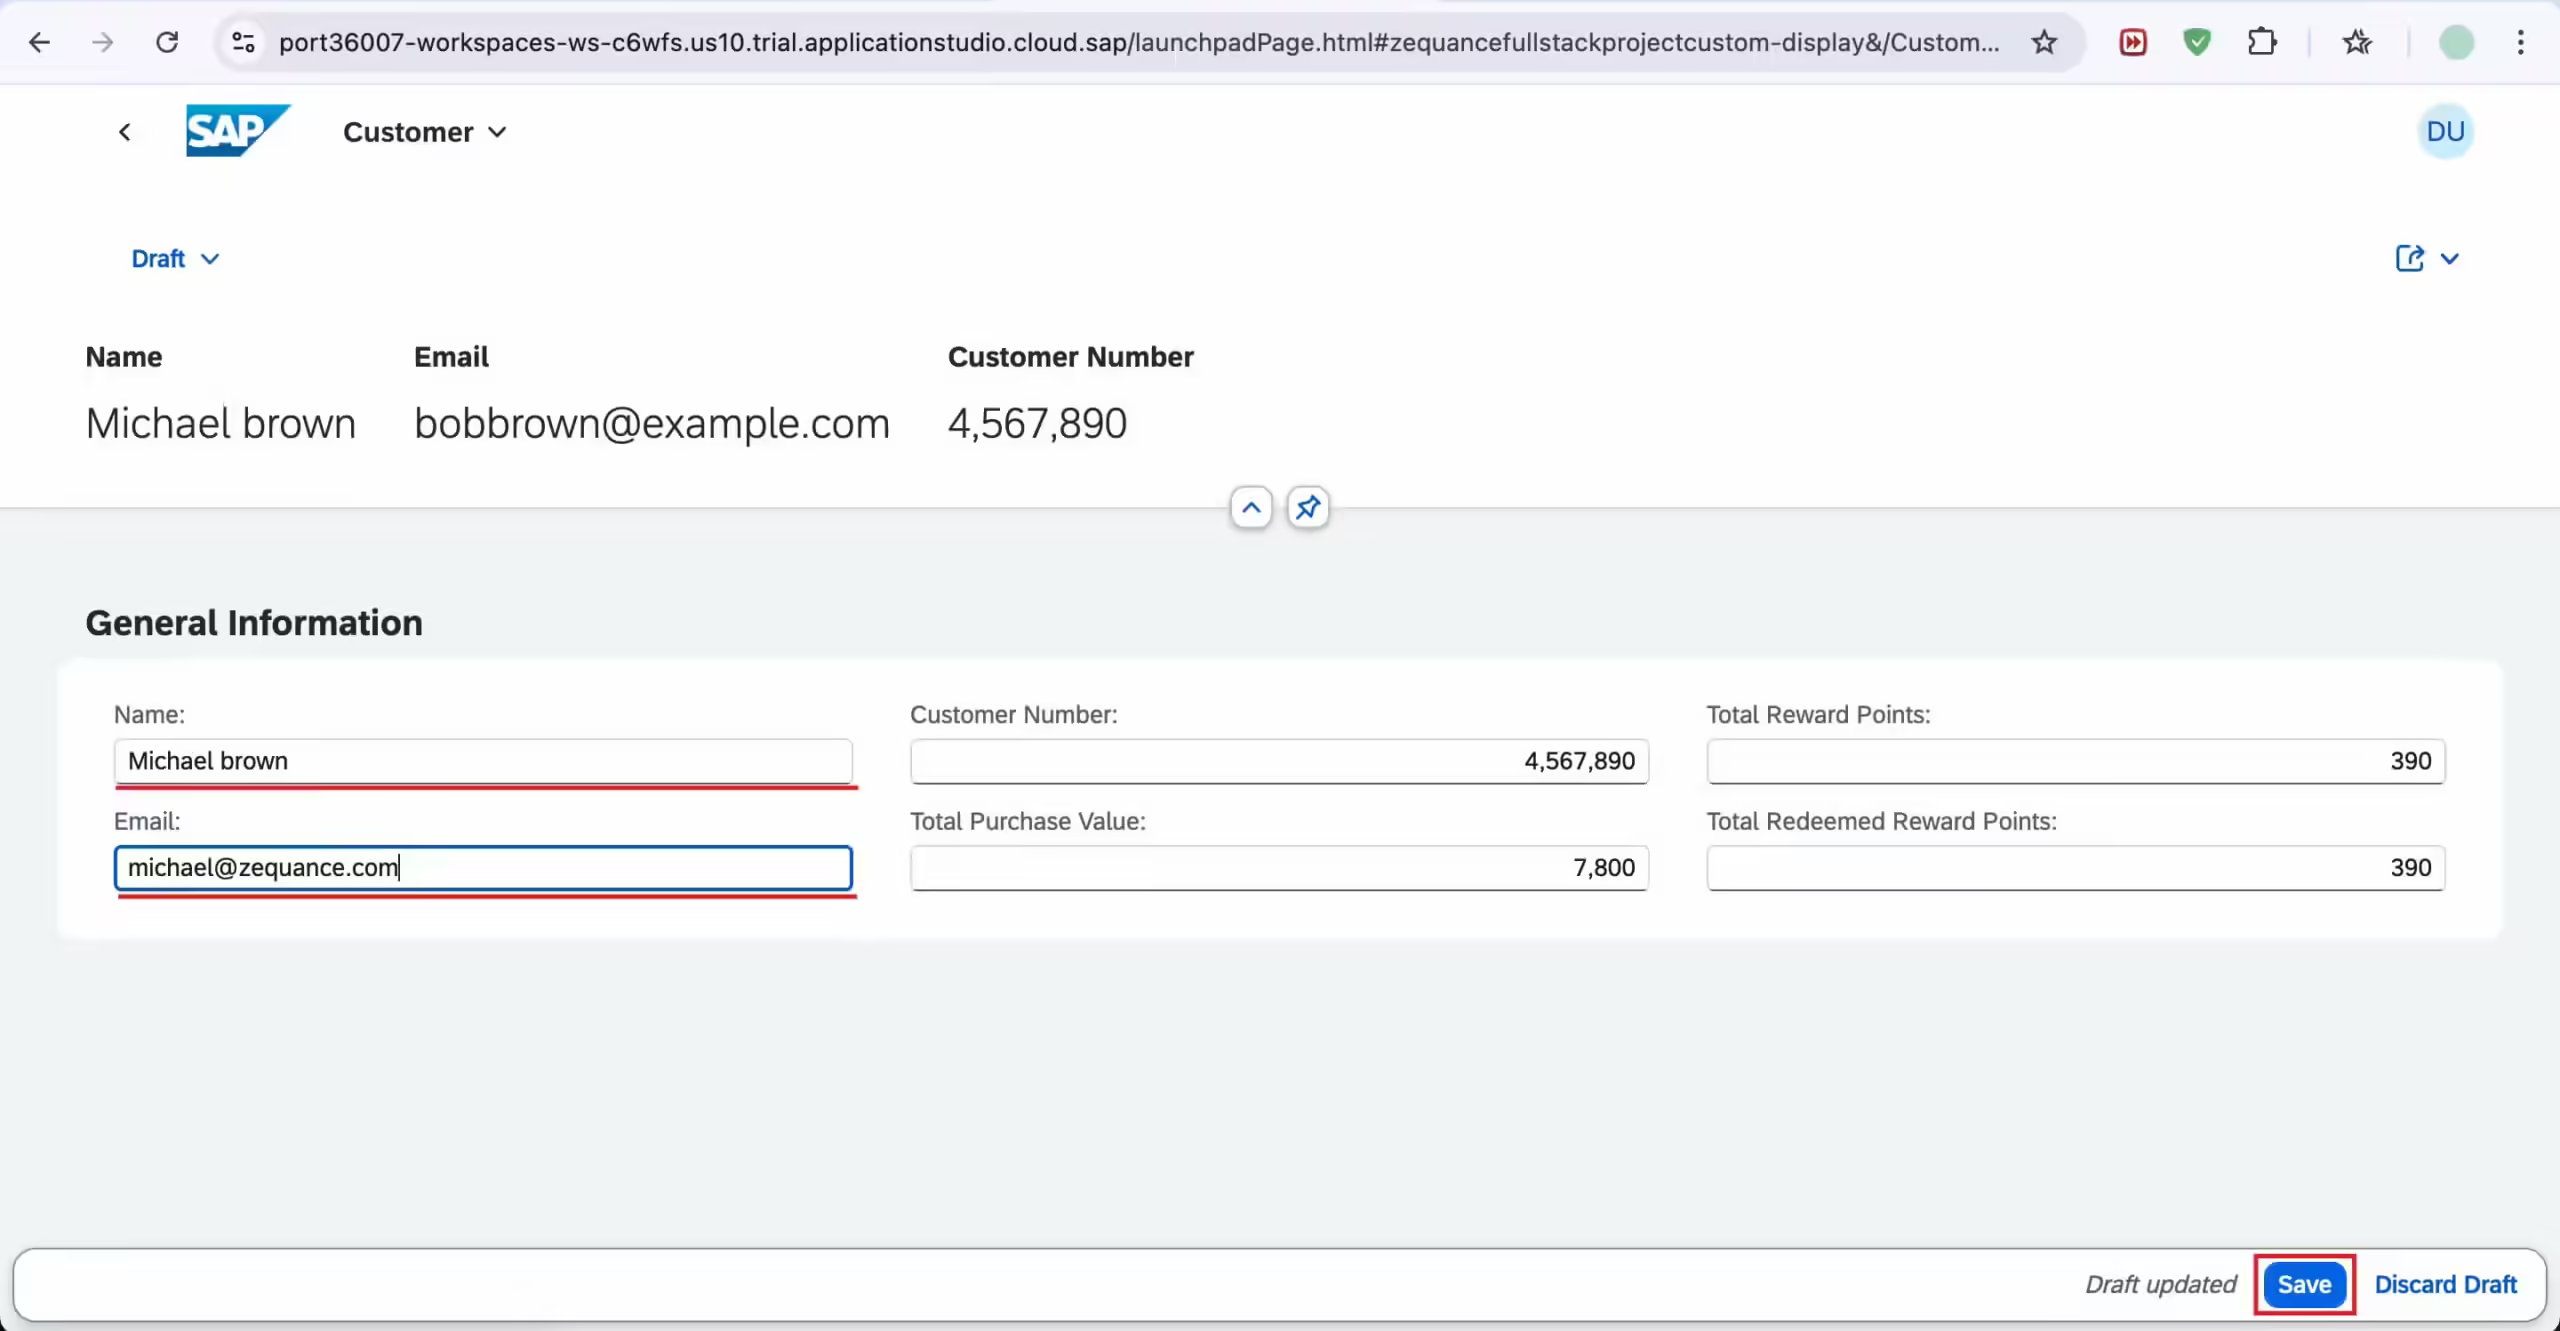
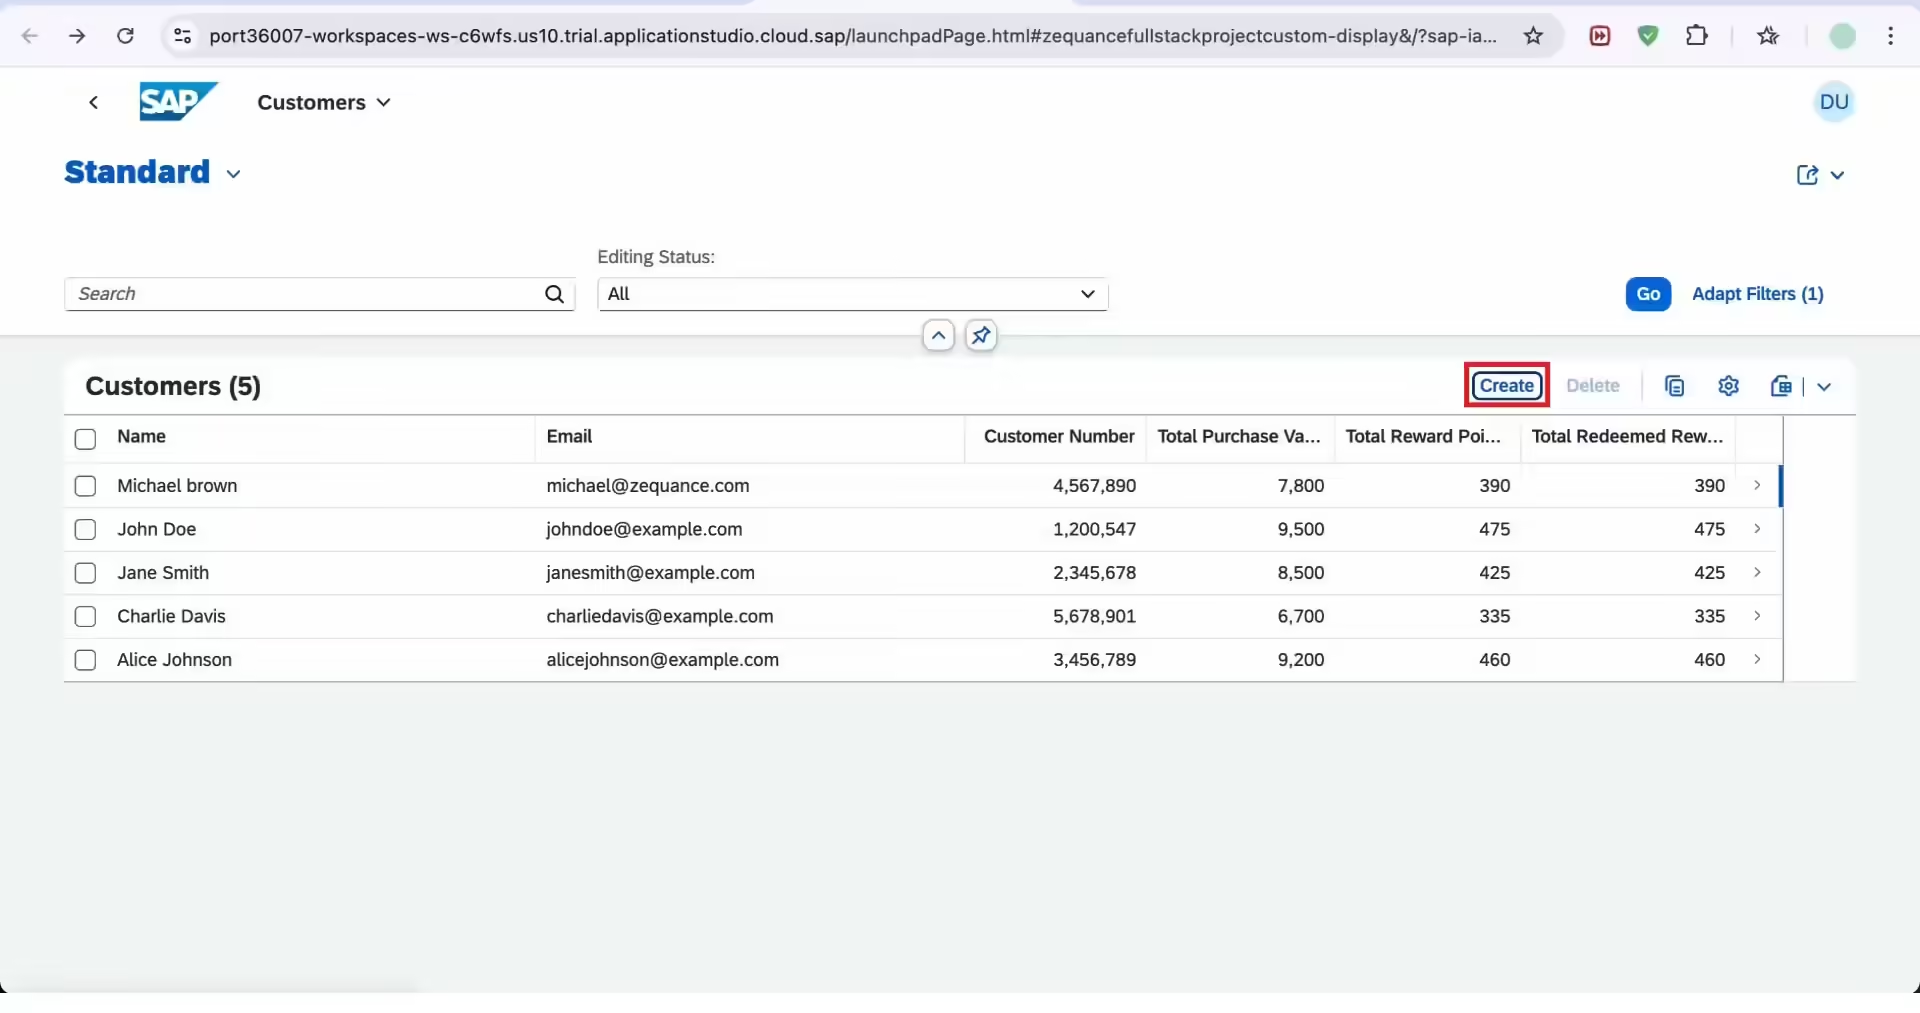
Great, now you are able to see the list of customers and you can edit it too.
Let’s test the Create functionality of the app. Click on the Create button.
And fill the details for a new customer as given below.
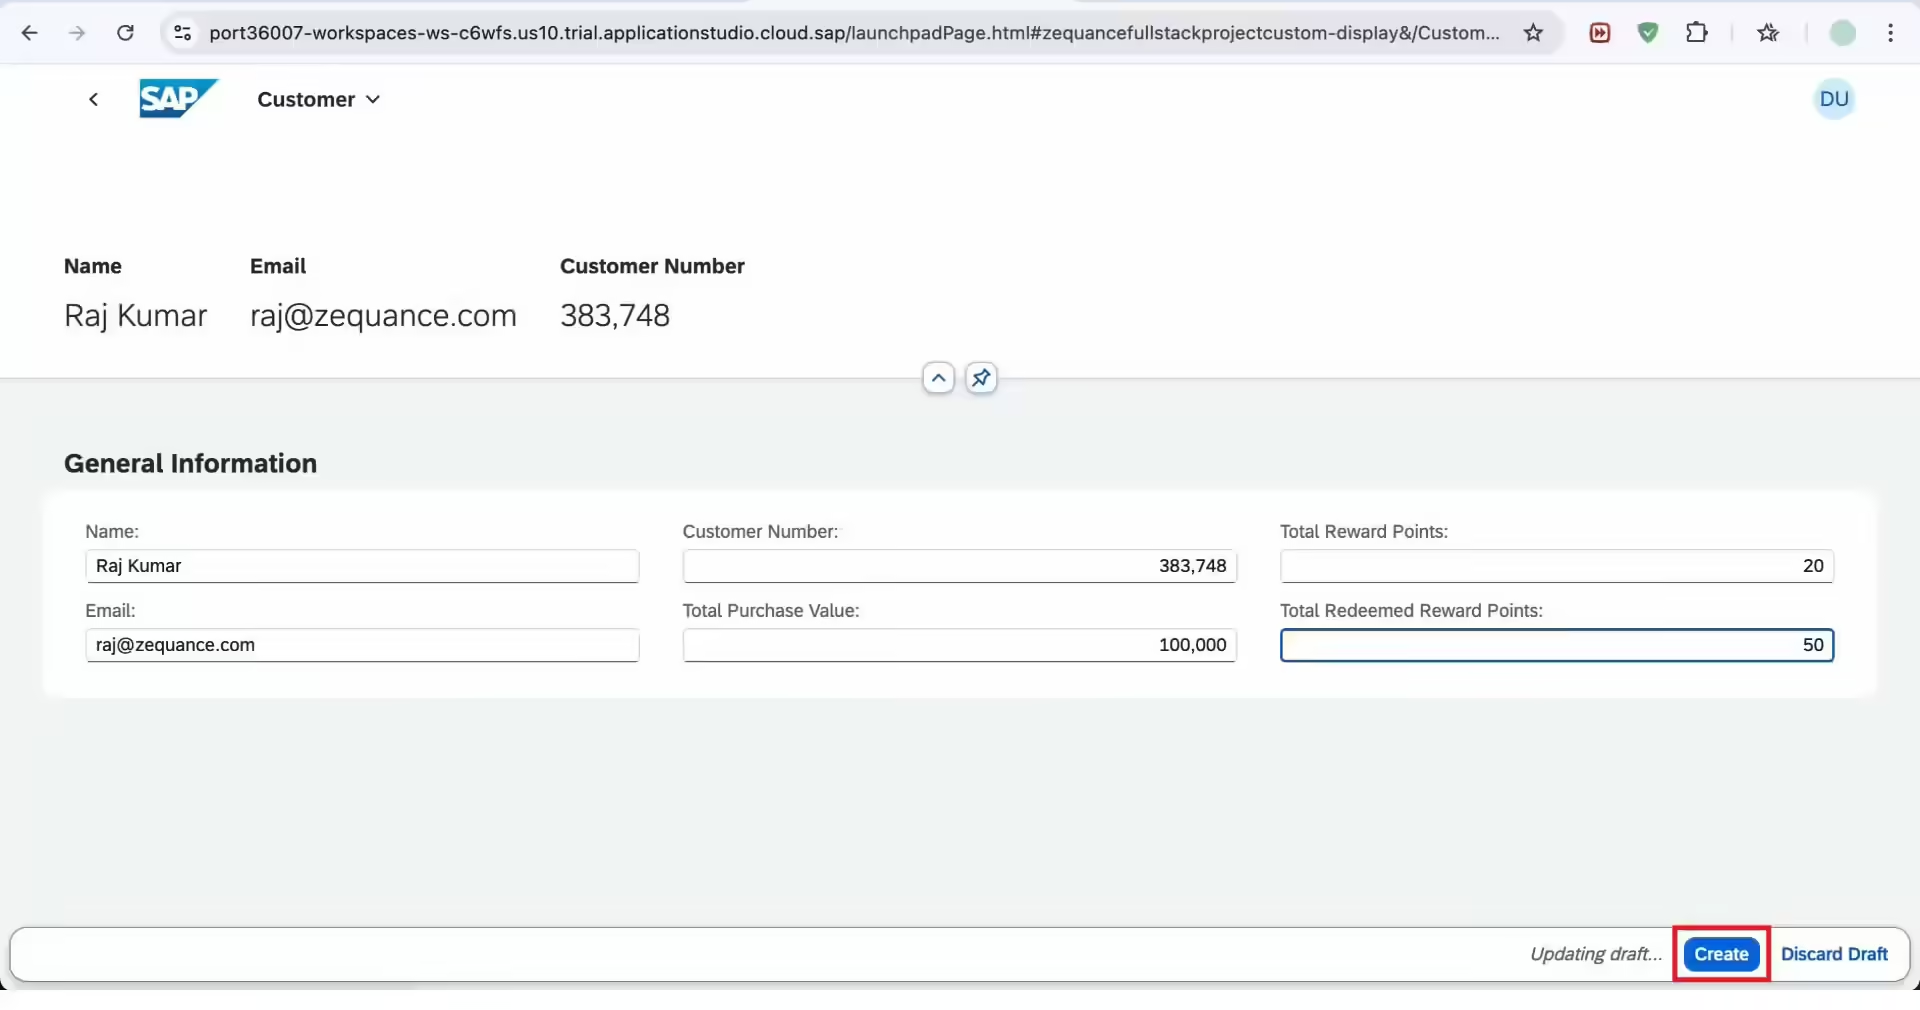
The new customer is now added successfully.

Alma TA is the SAP AI Solutions Director at Zequance.AI, specializing in SAP Business AI, SAP Joule, SAP AI Core, and Generative AI on SAP BTP. With a background in data science and enterprise analytics, she helps SAP professionals and organizations understand how SAP’s AI architecture works in real-world implementations.
Her work focuses on breaking down complex topics such as SAP RPT-1, Retrieval-Augmented Generation (RAG), SAP AI agents, and enterprise AI governance into practical, implementation-ready insights.
Alma regularly publishes in-depth technical breakdowns of SAP’s AI strategy and architecture, helping consultants, architects, and decision-makers design smarter SAP AI solutions.
")
: 4 Changes You Must Know to Pass")
